


Need to record streaming music, a podcast, or online meetings on your Mac? You're not alone. Although macOS does offer built-in tools like QuickTime and Voice Memos, their functions are pretty basic and limited by only external recording, no scheduling, and no editing.
Therefore, many Mac users also need smarter, feature-rich audio recorders that can record both internal and external sound on Mac. In this article, we'll show you five helpful ways and tools to record audio on Mac, including the built-in recorders, a free tool, and powerful third-party software.
How to Record Audio on Mac with VideoSolo Screen Recorder (Internal & External)
As anyone who has tried to record audio on a Mac knows, recording both internal and external sound at the same time on Mac is so complicated and difficult to operate. But things would be easier if you used VideoSolo Screen Recorder. It comes with a special Audio Recorder mode where Mac users can record all sound from computer with noise cancellation.
VideoSolo Screen Recorder has adjustable output formats such as MP3, M4A, WMA, FLAC, WAV, etc. that you can set to match different players with lossless sound quality The biggest surprise is that this recorder comes with a scheduled recording feature, with which you can flexibly make an appointment for recording. What's more, the Auto Stop function is also a highlight that can automatically stop recording based on the file size or specific time you've set. After the audio recording, you can directly use VidoeSolo to trim your file, which is far more convenient.
How to Record Internal Audio on Mac with VideoSolo?
Now, I will show you how to record audio on Mac with VideoSolo Screen Recorder.
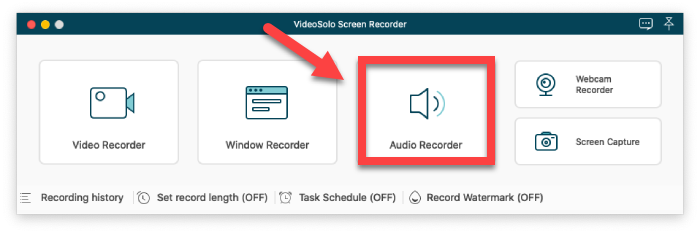
Step 1. Launch the app and click “Audio Recorder”
Free download VideoSolo Screen Recorder and run it on your Mac. Then click “Audio Recorder” on the main interface to record audio on your Mac.
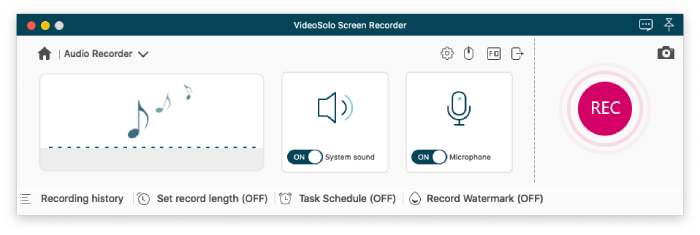
Step 2. Adjust recording volume
The next step is to set a proper volume for the recording. If you want to record both system and microphone sounds, turn two buttons to “On” mode and drag each slider to a place for proper volume.
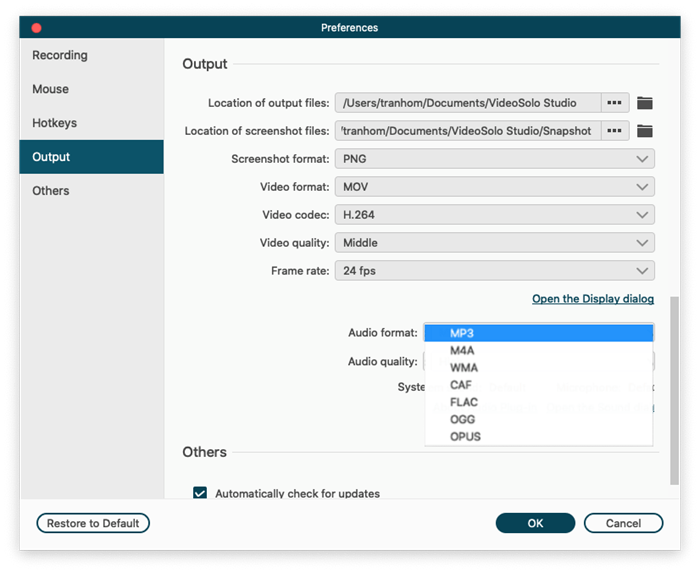
Step 3. Set up output format
Click the “Gear” icon above the “Microphone” icon and go to “Output”. Here you can change the audio format and audio quality based on your needs. For Mac, the audio formats include MP3, M4A, WMA, CAF, FLAC, OGG, and OPUS.
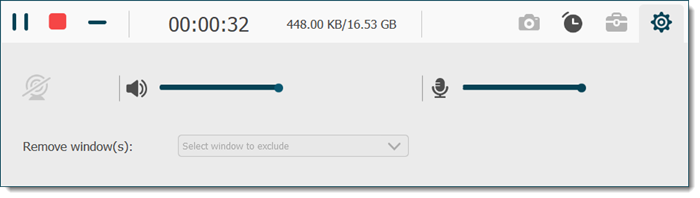
Step 4. Start recording audio on Mac
After setting, click “REC” to start recording the audio. During the recording, you can click “Pause”, “Stop”, “Set record length” and other options to control the audio track.
Step 5. Save audio recording to the computer
When it is done, you can preview and use the trimming tool to cut the recording. Click “Save” to finish the process. And you can see all the recording tracks in “Recording history”.
How to Record Audio on Mac with Voice Memos (Easy for External Only)
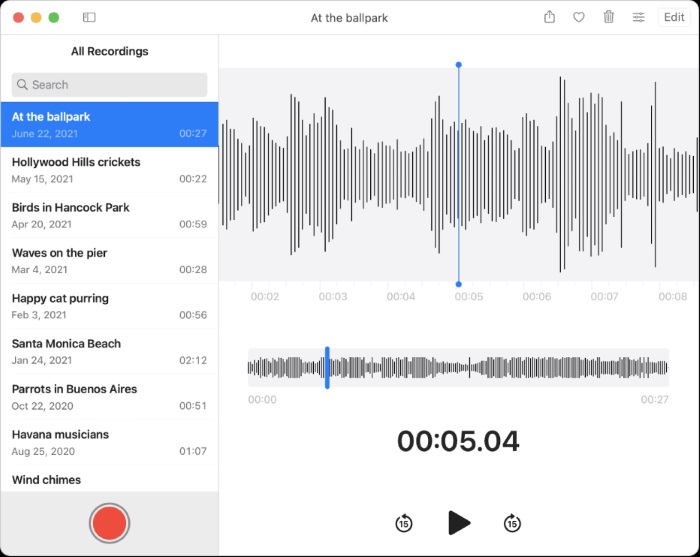
Mac itself also comes with some recording tools. If you're running madOC 14 or later, Voice Memos is one of the good options, whose features are similar to the app on iPhone. Voice Memos, however, only offers simple features when compared with VideoSolo Screen Recorder. It can only record the sound of the built-in microphone, a supported headset, or an external microphone. If you want to record computer system sound, using this software is unable to meet your needs. The audio format of Voice Memos is M4A and you are not allowed to change it. Now, let's take a look at how to use this software to record audio.
Step 1. Turn on the Voice Memos app on your Mac and click the “Record” button at the bottom.
Step 2. If you want to pause, just click the icon in the bottom left. To continue, click “Resume”.
Step 3. When you finish the recording, click “Done” in the bottom right corner.
How to Record Audio on Mac with QuickTime Player (Universal Choice)
Similar to Voice Memos, QuickTime Player, another built-in recording tool on Mac, can only record external audio like your microphone when used directly. But it offers more possibilities that you can install the plugin Soundflower to enable the internal system sound recording feature.
In general, QuickTime Player allows you to record both system and external sounds, but it's a bit complicated as you still need another tool. The steps below show you how to record external sounds directly using QuickTime Player and how to record Mac audio with Soundflower installed.
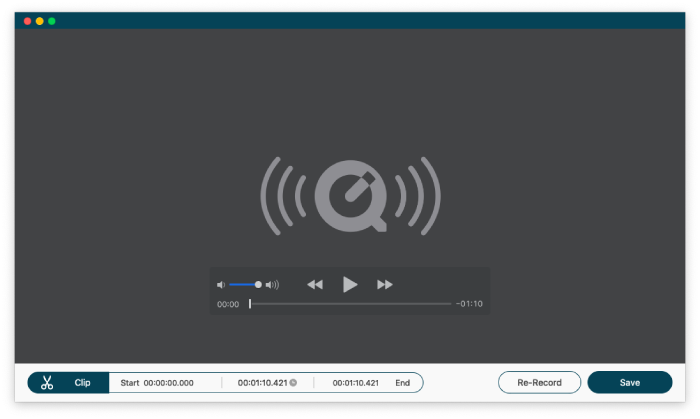
Step 1. Open QuickTime Player on your Mac. Choose “File> New Audio Recording” from the list.
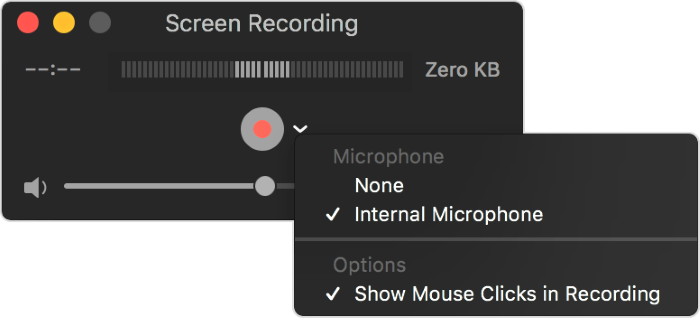
Step 2. In the main interface, click the “Arrow” icon to choose recording options including which microphone you want to use and what recording quality.
Step 3. Drag the volume slider to adjust the sound of your audio recording. Then, click the “Record” button to get started. Click the “Stop” button when you're done.
Step 4. Then you can click “File” and “Save” to name the recording and choose the location on your disk.
Now that you've learned how to record external audio, let's see how to install the plugin Soundflower and record internal audio.
Step 1. Download Soundflower, unzip the package, and install it on your Mac.
Step 2. Then open “Finder” and choose “Audio MIDI Setup”. Click “Application” and “Utilities”.
Step 3. Then click the “Multi-Output Device” option and head to “Create Aggregate Device” and “Create Multi-Output Device”. Tick “Built-in Output” and “Soundflower(2ch)” on each of the device setups.

Step 4. Now follow the “Apple menu > System Preferences > Sound” instructions to do the final setting. Choose”Multi-Output Device” as the device for output.
Step 5. You can launch QuickTime Player and choose “New Audio Recording” again. Click the drop-down menu. If you want to record internal audio only, click “Soundflower(2ch)”. If you want to record both internal audio and external audio at the same time, choose “quick time play input”
How to Record Audio on Mac with Audacity [Free]
Another effective way to record sound on a Mac is to use Audacity, which is famous as a free, open-source audio recorder and editor. It can run on Windows, macOS, and Linux. With it, you can record live audio or edit tracks, and export them in regular formats like MP3, WAV, and OGG. Besides, its interface is very user-friendly.
However, like the built-in recorders, it cannot directly record the internal sound on Mac computers. Moreover, its interface is kind of outdated.
Here is a detailed guide to recording sound on a Mac with Audacity.
Step 1. Install and launch Audacity. Create a new project by clicking "File" > "New".
Step 2. Choose the audio input device you want to use. Go to 'Preferences' and then click 'Devices'.
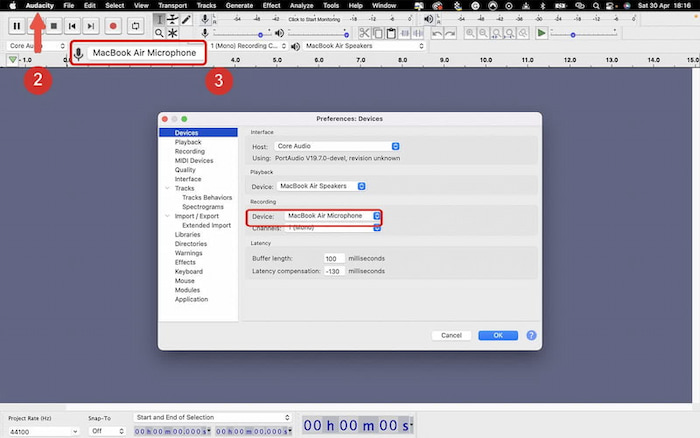
Step 3. To start recording, click the red circle on the top left-hand side of the screen.
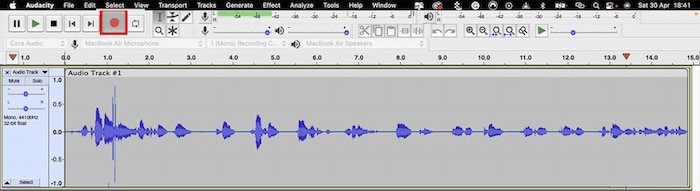
Step 4. If you want to stop recording, click the stop icon. When the recording is done, click on the play button, and you can listen.
Step 5. If you need, you can edit the audio file in the Effects section.
Step 6. When everything is finished, click "File" to choose the output formats (e.g., MP3 or WAV format), and then File > Export > Export Audio to save your recording sound on Mac.
How to Record Audio on Mac with GarageBand (Best for Music Production)
Last but not least product is GarageBand, a fully equipped music creation studio on Mac. Aside from providing professional musical instruments, the app can also be used to record audio. Thus, if you want to record songs, GarageBand is the best option as it is a professional music-making studio. It comes with comprehensive features and a modern design.
However, GarageBand can only record microphone sound. Since it is designed for music creators, it is relatively difficult to operate. Follow the instructions below to learn how to record audio on Mac with GarageBand.
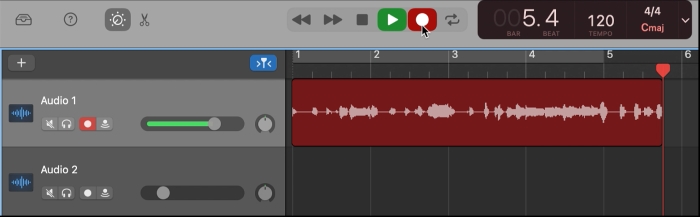
Step 1. Download and launch GarageBand on Mac and select the header of the audio or guitar/bass track you want to record.
Step 2. Then move the playhead to the point in the ruler where you want to start recording. Set the metronome and count-in so you can hear a steady beat while recording.
Step 3. Click the “Record” button to start singing or playing your instrument. If you want to stop recording, click the “Stop” button.
Comparison Table Between 4 Ways to Record Audio on Mac
This is a comparison table of the 4 ways introduced above. It clearly shows you several key points that you may care about when seeking an audio recorder. Check them out and choose the one you like.
| Internal Audio | External Audio | Output Format | Output Quality | Easy to Use | Cut Audio | |
|---|---|---|---|---|---|---|
| VideoSolo Screen Recorder | √ | √ | MP3, M4A, WMA, CAF, FLAC, OGG, OPUS | Lossless | √ | √ |
| Voice Memos | × | √ | M4A | Compressed/Lossless | √ | √ |
| QuickTime Player | × (Sound-flower√) | √ | MPEG4 | igh /Maximum | × | √ |
| GarageBand | × | √ | AAC, MP3, AIFF, WAVE | High | × | √ |
FAQs About How to Record Sound on Mac Computers
How to choose a Mac audio recorder?
You can consider these aspects: output formats, quality, noise reduction, ease of use, and so on. By the way, you can also search for some reviews from users to evaluate the programs.
How do I record internal audio on a Mac?
VideoSolo Screen Recorder is an excellent option for recording internal audio on a Mac. It is user-friendly with simple operations. With it, you can easily and quickly record both internal and external audio on macOS computers.
Conclusion
Overall, all five methods are capable of recording audio on a Mac. Voice Memos is the simplest one with a single recording feature. GarageBand is a professional music recording tool with abundant functions, but relatively complex to operate. Audacity is free to use at no cost. The three ways mentioned above can only record audio with external microphones.
QuickTime Player, Mac's built-in software, can only record microphones by default, but with the Soundflower plugin downloaded, you can use it to record system and external sounds. Last but not least, VideoSolo Screen Recorder can get rid of all these problems. It allows users to choose any built-in speaker and external microphone to record audio. Try it now!

