


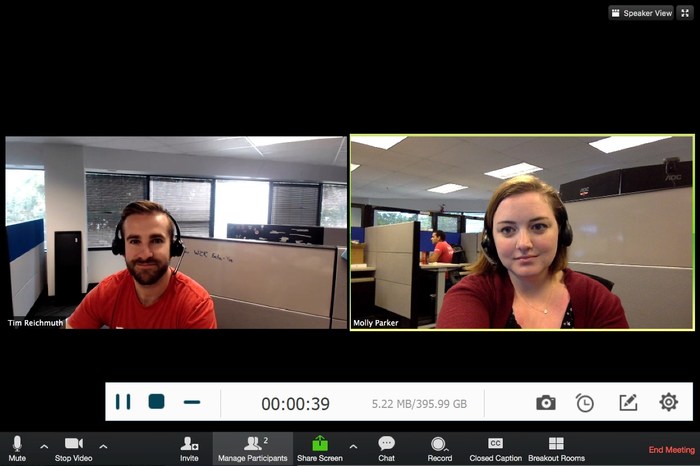
Nowadays, Zoom meetings play a vital role in both personal and professional spheres. There are times when you may need to record an online meeting for future reference or to share important information with others. However, the question how to record a Zoom meeting often arises.
This full guide will explore seven effective methods to help you achieve this task, including methods for Mac and Windows, iPhone and Android phones, iPadOS, and online.
Whether you're a host or a meeting participant, these methods will help you record Zoom meetings without permission responsibly and effectively.
Can You Record a Zoom Meeting?
Yes, Zoom allows recording, but with strict limitations based on your account type. Understanding these rules is important to avoid legal issues or failed recordings.
Free Accounts (Basic):
• Local Recording: Only available to hosts. Participants cannot record.
• Cloud Recording: Disabled entirely.
• Time Limits: Group meetings cap at 40 minutes.
• Storage: Local files are saved to your device (no cloud backup).
Paid Accounts (Pro/Business/Enterprise):
• Host Privileges: Enable local or cloud recording for yourself or delegates.
• Participant Access: Allow attendees to record with explicit permission.
• Unlimited Duration: No 40-minute cutoff (varies by subscription type).
• Cloud Storage: 1 GB – 100 GB+ storage space, depending on plan.
Free users can technically record via third-party Zoom meeting recorders like VideoSolo Screen Recorder (explain later), but always comply with Zoom's Terms of Service and privacy laws.
How to Record a Zoom Meeting as a Host
Recording as a host is straightforward and offers more control over the process. Follow these steps below:
1. Open Zoom and start a new meeting. Ensure you're signed in as the host.
2. Click the "Record" button in the meeting controls to start recording.
3. You can click the arrow next to the Record button to adjust settings like audio quality, video resolution, and whether to include non-video participants.
4. When the meeting ends, click "Stop Recording." For cloud recordings, Zoom will process the video and email you when it's ready.
How to Record a Zoom Meeting as a Participant
Generally, if you want to record a Zoom meeting as a participant, you need to request permission from the host. However, the host can revoke permission anytime, and some meetings disable participant recording entirely. In this case, you need a valid workaround like a third-party screen recorder.
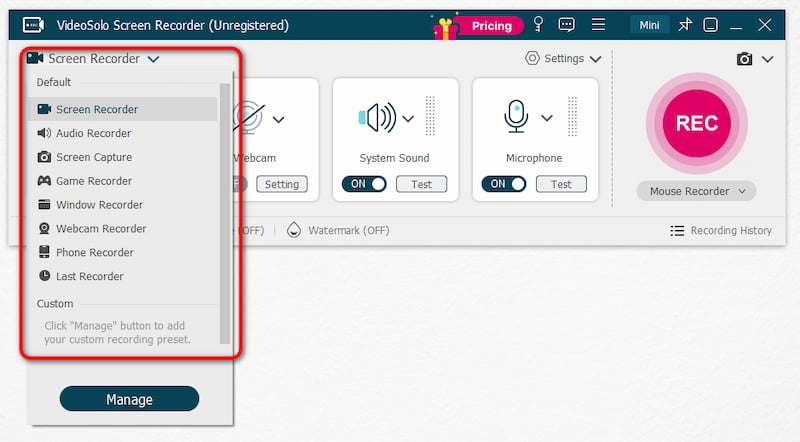
Here, I recommend VideoSolo Screen Recorder as the best tool to help record a Zoom meeting without permission. It provides multiple recording modes and allows you to capture the full screen or a specific screen. A custom-sized recording screen is also permitted. You can choose to record the system audio, the microphone audio, or both. Then, output the recorded files as MP4, MOV, etc., at up to 4K UHD quality. Let's see how to use it to record the Zoom meeting as a participant without permission.
Step 1. Download, install, and run this software on your computer.
Step 2. Choose Screen Recorder as the recording mode. Here, you can also select to record System Sound or Microphone Sound.
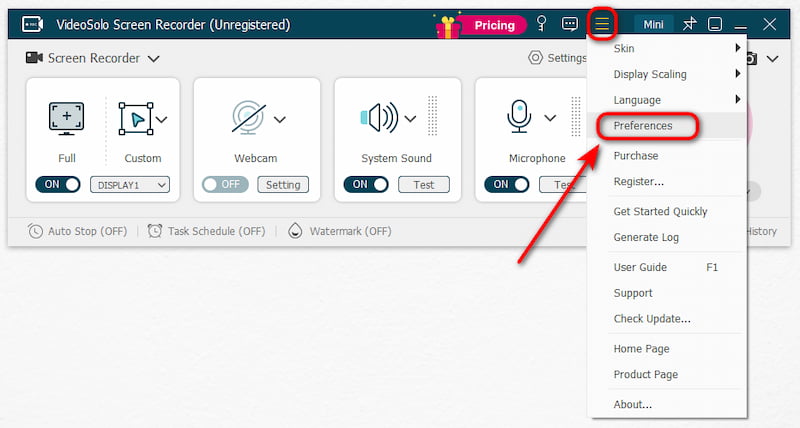
Step 3. Open "Preferences" in the top-right corner to select your output settings.
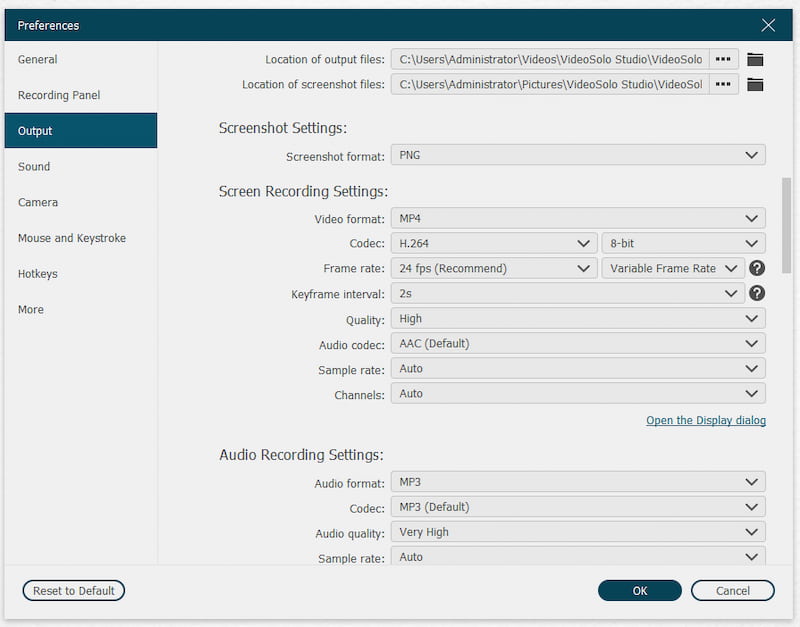
For example, you can go to the "Output" tab to change the video format and quality as well as the output path. It allows you to explore more in the Preferences panel.
Step 4. Open your Zoom app and enter a meeting as a participant. Click the "REC" button of VideoSolo Screen Recorder. You can edit, draw, or add annotations during recording with VideoSolo Screen Recorder's built-in panel.
Step 5. The recording will then be in progress, and when it ends, click the "Stop" button. The recorded file will be automatically saved to the folder you've set before.
Also, here's the step-by-step video tutorial for how to record a Zoom meeting as a participant without permission:
How to Record a Zoom Meeting on a Laptop [Mac/Windows]
How to Record a Zoom Meeting on a Laptop? Well, for Mac and Windows users, there is a built-in tool offering recording services. Let's have a look.
How to Record a Zoom Meeting on Mac
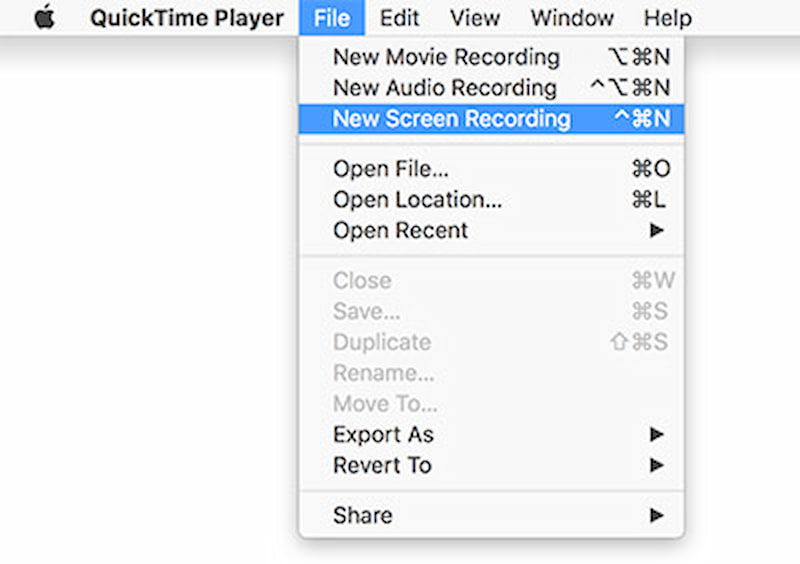
For Mac users, QuickTime Player is the quickest solution:
1. Open QuickTime Player and select "File" > "New Screen Recording".
2. Click the "Record" button, select the Zoom window, and start recording.
3. Stop by clicking the "Stop" button in the menu bar.
You can also press and hold Command + Shift + 5 to start a quick record. Once finished, click the thumbnail in the corner of your screen to save your recorded video.
How to Record a Zoom Meeting on Windows
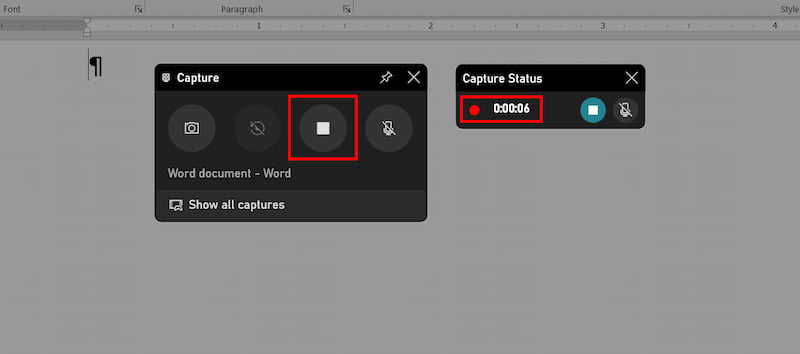
For Windows users, you can try the Xbox Game Bar to solve the problem:
1. Open Xbox Game Bar and click the "Record" button (or use Win + Alt + R).
2. Switch to the Zoom meeting and start recording.
3. Stop by clicking the "Stop" button or pressing Win + Alt + R again.
You can also press and hold Win + Shift + S to start a quick record.
QuickTime Player does not offer selective window capture or editing features. Xbox Game Bar can only record a 2-hour meeting at most, and you cannot separate the microphone and system audio when recording. In contrast, VideoSolo Screen Recorder can solve these issues effortlessly, letting you record Zoom meetings without any restrictions.
How to Record a Zoom Meeting on iPhone/iPad/iPad Pro/Android
We also provide methods to record a Zoom meeting on iPhone, iPad, and Android. Read on to learn more.
How to Record a Zoom Meeting on iPhone/iPad
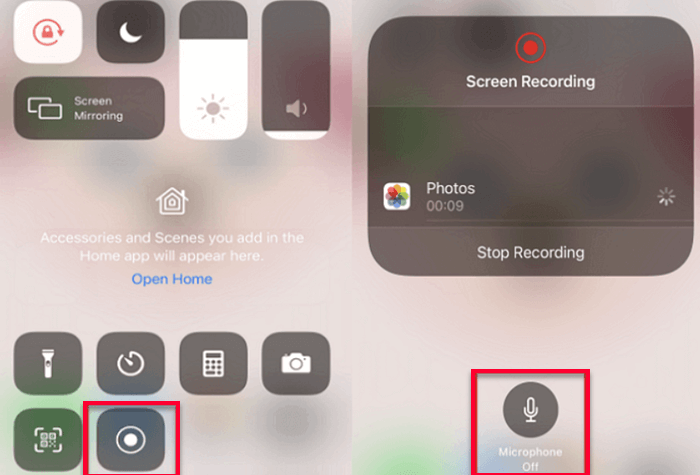
1. Go to "Control Centre", long-press the "Screen Record" button, then turn on the "Microphone".
2. As a Zoom meeting starts, simply swipe down the "Control Center" on your screen and tap the "Screen Record" icon. Your device will record the Zoom meeting without permission after a 3-second countdown.
3. When the meeting is over, open "Control Center" and tap the icon again, and the recorded Zoom meeting will be saved in your camera roll to look back on.
How to Record a Zoom Meeting on Android
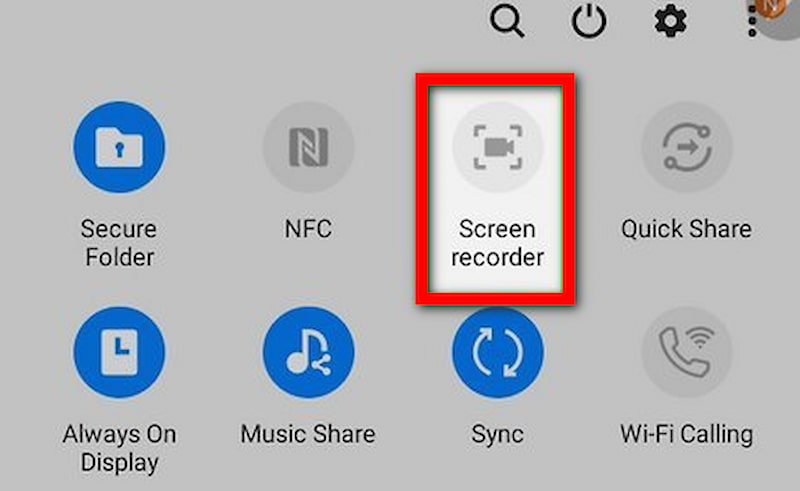
1. When the Zoom meeting starts, swipe down from your screen, tap the "Screen Recorder" button to record the Zoom meeting.
2. Agree to record the microphone and sound on screen before the recording starts.
3. Your phone starts to record the Zoom meeting with audio after a countdown. When the meeting ends, tap the screen recording notification to stop recording.
How to Record Zoom Meeting via Chrome Extension [Online]
Instead of installing extra software, you can also record a Zoom meeting online, using a Chrome extension. Here we recommend Fluvid, whose free plan supports recording 50 free videos each up to 1 hour long at max. Follow the steps below to use this Chrome extension to record a Zoom meeting:
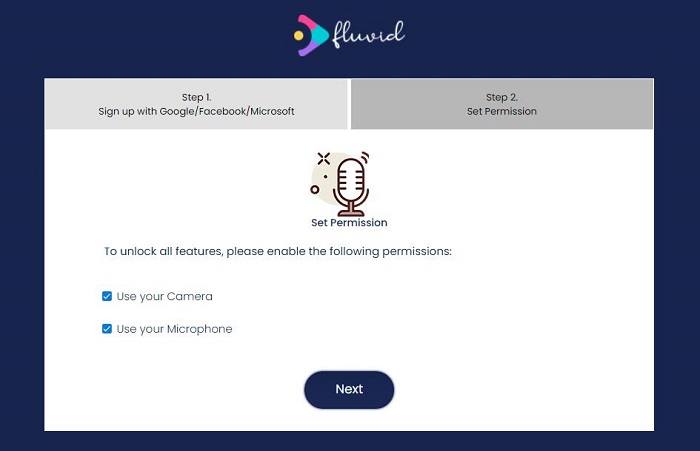
Step 1. Navigate to the Chrome Extension store and search for Fluvid. And then click on "Add to Chrome."
Step 2. You must authorize an account to enable the recording permission, then click on the "Next" button to proceed.
Step 3. After creating an account, simply launch it. Open the Zoom meeting tab and select the "Current Tab" mode. To record a Zoom meeting with audio, turn on the Microphone option.
Once everything is configured, click the "Start Recording" button to commence.
FAQs
Can you record Zoom meetings for free?
Yes, but only hosts on free plans can use local recording. Participants require paid upgrades or third-party tools like VideoSolo Screen Recorder.
Where are the recorded Zoom meetings on a PC?
• Local Recordings:
Windows: C:\Users\YourUsername\Documents\Zoom
Mac: Users/YourUsername/Documents/Zoom
• Cloud Recordings:
Access via the Zoom web portal under "Recordings".
Can you record a Zoom meeting if you are not the host?
Generally, if you want to record a Zoom meeting as a participant, you must get permission from the host. Otherwise, you may need help from a third-party Zoom meeting recorder like VideoSolo Screen Recorder.
How to record a Zoom meeting without permission?
You can use the built-in tool on your devices, but they always have limitations. For example, long recording sessions can quickly consume your device's memory and may lead to issues such as overheating and sluggish performance. Try VideoSolo Screen Recorder, the professional screen recording software, instead of recording a Zoom meeting without limitations.
Conclusion
While Zoom offers an official recording feature, additional options for high-quality, permission-free Zoom meeting recording exist. Zoom's built-in local recorder is ideal for Zoom App users, but for non-hosts looking to record a Zoom meeting as a participant without permission, VideoSolo Screen Recorder is the most dependable choice on Mac and Windows. You can download and try it for free right now.


This is a really helpful post. Thank you very much for sharing it for me and everyone to know.
This is, in my opinion, one of the best posts that you have made. Your work is quite outstanding in both quality and quantity. I am grateful to you for it.
Nice guide. I would like to test it in my upcoming zoom meeting:)
Thanks for info!