You certainly will lose the interest to watch a video if the video is shaky as it keeps you from focusing on what really matters, the content. It happens a lot to those who do not have special equipment to make family video to documentary. It hurts you heart to know your audience can't enjoy you work especially you put a lot of effort into it. But now there is no need to worry about it since you will learn the easiest way to stabilize a shaky video after reading this article.
The Best Video Stabilizer Recommended -- VideoSolo
In case you might not be familiar with this software VideoSolo Video Converter Ultimate, let me tell something about it. It specializes in converting video/DVD and improving video quality. It allows you to convert video between more than 300 video formats with high output quality at 6x faster converting speed. Clipping, cropping and rotating are all accessible. Stabilizing shaky video is one of its outstanding features in video quality improving and steps to do it are rather simple. The output is always satisfying.
Next is the steps to stabilize a shaky video.
Step 1. Download Video Converter Ultimate
Of course, if you want to use the program, you have to download it first. Click on the button below to download the version that suits you computer system, either Windows or Mac. What you can get from it is you can try a trail version to see the outcome although there is a time limit.
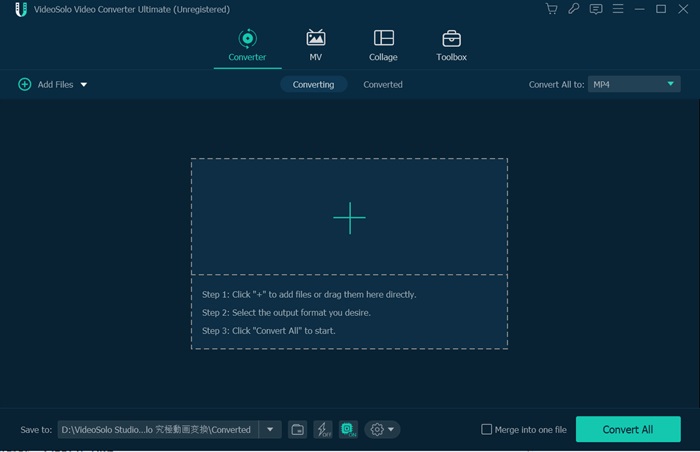
Step 2. Add Files
Once you downloaded the software, open it. You will see a main interface with “Add files” button on the top. Click on it and upload the video you want to remove the shaking. After the uploading is done, choose”Video Enhance”, which leads you to many options to improve the video quality on the right side.
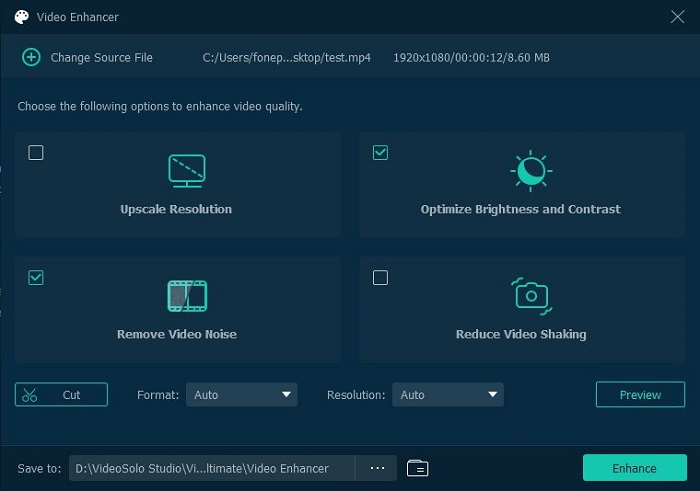
Step 3. Remove the Shaking
On the right side, you can see a option “Reduce Video Shaking”. check the box next to it and click on the button “Apply ” to let the system start working. How long the process will take depends on your video.
Step 4. Output the Video
After that, you need to select a output format and click “Convert” button to export the video. Of course, you can remain all the original parameters as you like.

Exclusive Way for Mac User to Stabilize Video via iMovie
If you are a Mac user, there is another program for you to stabilize the shaky video, iMovie. Let me show how the iMovie stabilization works.
Step 1. Upload Video Files
Open the iMovie App on your Mac. And in the timeline, you can select the video clip that you want to stabilize.
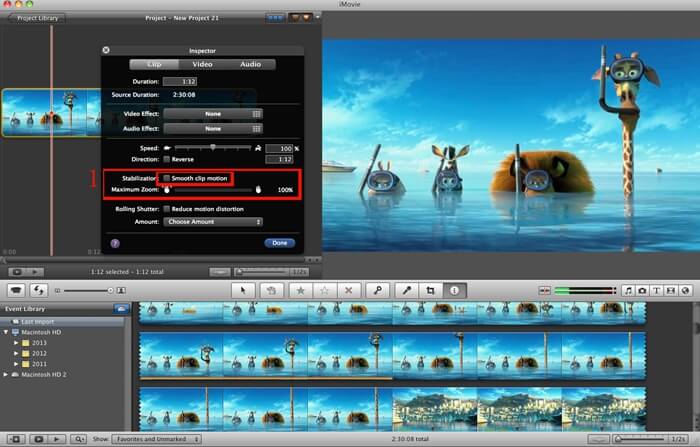
Step 2. Stabilized the Shaking Video
In the menu bar, click on the button “Stabilization”, and then check the box beside “Stabilize Shaky Video “. The checkbox will be replaced by an activity indicator until the video clip has been analyzed and stabilized.
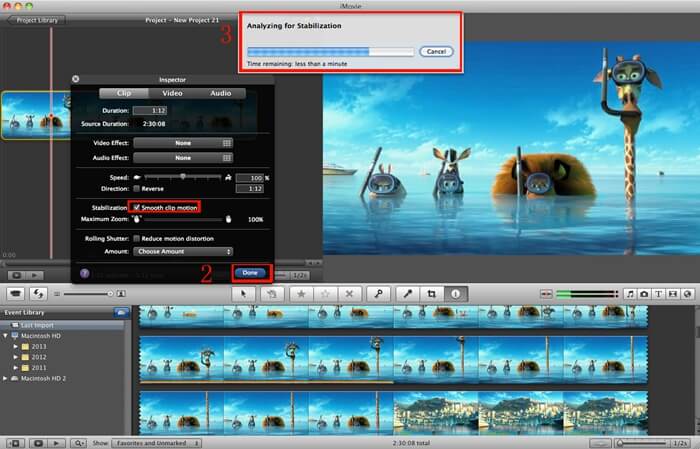
Step 3. See the Effect
Drag the Stabilize Shaky Video slider to adjust the amount of stabilization applied to the clip, and then you can play the video clip to see the effects of stabilization.
How to Stabilize Shaky Video Using Adobe Premiere Pro in Steps
Adobe Premiere Pro is also a professional tool to help you make the videos look right or stabilize them within a few clicks. Its Warp Stabilizer effect can smooth out unwanted camera shake, with precision fine-tuning so that you can get exactly the look and feel you want. However, the operation process may be complex and difficult for users. Here's the step-by-step guide on how you can stabilize your shaky videos shot on GoPro, smartphone, drone etc. with Adobe Premiere Pro.
Step 1. Open Adobe and Import Video File
You can add your video clip to Adobe in any of the following ways:
- Drag the file from Media Browser into the Project panel
- Drag the file from Media Browser into a timeline
- Select Video File > Import from Media Browser
- Right-click the video file in Media Browser and select Import
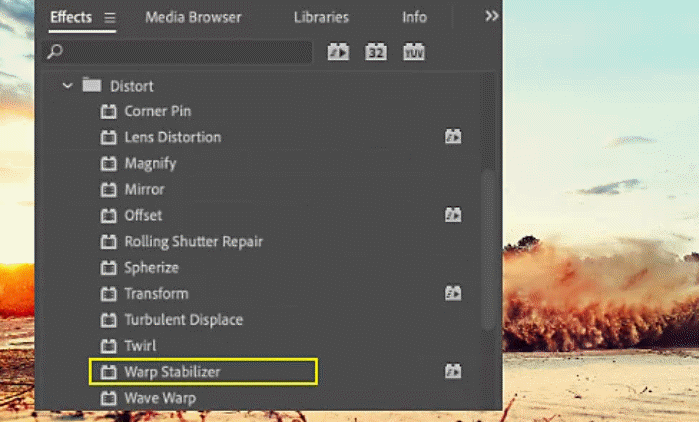
Step 2. Apply the Warp Stabilizer to Shaky Video
Select the video clip you want to stabilize. And then, in the Effects panel, choose Distort > Warp Stabilizer. Next, double-clicking or dragging the effect to your video in the Timeline or the Effect Controls panel to apply the effect.
Step 3. Adjust the Stabilization as You Need
After the operation process of Warp Stabilizer has completed, you are allow to examine your work and make adjustments to ensure the video features everything you need to see in the shot. If parts of your video looks woozy or wobbly after stabilizing, it's been over-smoothed. You can adjust for that. If the stabilizing caused you to lose some edge material you wanted, you can also adjust the frame to get it back.
Conclusion
Shaking video is a really tricky problem, but it is not after you get some help from the expert, a program that can deal with it. You no longer have to walk very slowly or hold the camera very carefully when filming. You can film your little girls running in the yard or chase running rabbit in the wood without any concern.
VideoSolo Video Converter Ultimate is a good choice for removing shaking. It has received over 100,000 user reviews and they are all saying good experience about this product. You can try the product and see for yourself.
It is a good deal that you can enjoy its latest service without any cost after you purchase it. Besides it is available to Windows and Mac while iMovie is exclusive to Mac users. On the other hand, VideoSolo Video Converter Ultimate is cheaper and easier to use than Adobe Premiere Pro and it provides a trail version for any uncertain thoughts.

