Nowadays, more and more people are fond of sharing and posting videos on social platforms. If you're a video contents creator of YouTube, Twitter or other platforms, you may feel angry when your well-made videos are copied by others. The best solution to avoid copying videos is to add watermark to your video so that the audience know the original creator of the content. Furthermore, adding a watermark to the videos make them more personalized and promote your brand or company. Here, I highly recommend you five practical ways to add watermark to video quickly and easily.
Add Watermark to Video Easily via Professional Watermark Maker
VideoSolo Video Converter Ultimate is a useful video watermark maker to add text/photo watermark to video in simple clicks. To make watermark more personalized, this program enable users to customize the font, font style, size, writing system and effect of the text watermark. You can also add any picture as your photo watermark. For both the text watermark and the photo watermark, you can adjust the area, size, and transparency.
Compared to online and other watermark tools, VideoSolo supports various images watermark formats like JPEG, PNG, BMP, GIF, TIF, TGA. It also equips a video converter that allows you to select output format between 1000+ formats.
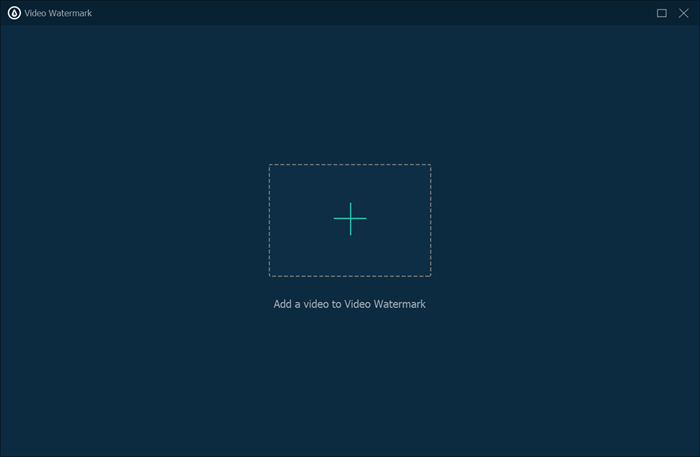
Step 1. Launch VideoSolo Video Converter Ultimate
After installation, launch it on your computer. In the main interface of toolbox, you can see “Video Watermark” listed the first one in the fourth line.

Step 2. Import Video Clips that Want to Add Watermark to
Now click “Add File” to import the video file that you want to add text/picture watermark to. After importing, you can preview the video in the real-time window.
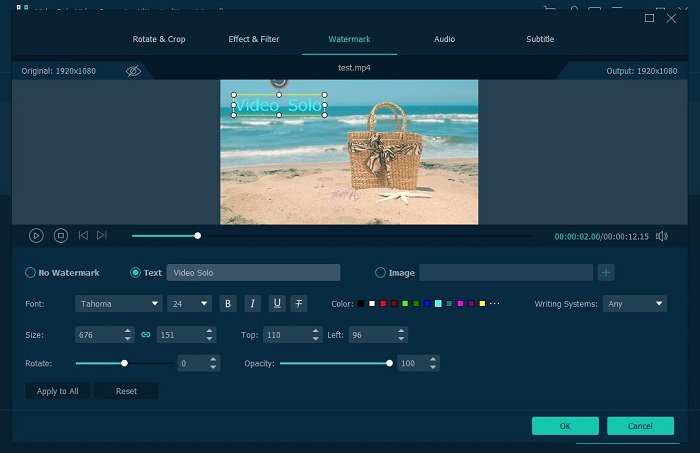
Step 3. Add Watermark to Video
If you want to add text watermark, directly filled in the blank. Then you can adjust font, font style, size, writing system and effect in the right-down setting.
If you want to add a log or picture to the video, enable “Image Watermark” option and then select from your computer folders. VideoSolo supports JPEG, PNG, BMP, GIF, TIF. After that, you can adjust the watermark area and transparency. It's worth mention that you can directly adjust the watermark in the preview window.
Step 4. Export Video Files with Watermark Added
If you are wanting to upload your video to YouTube, Instagram, Facebook or a different video sharing platform, you can even convert your video to the required output format and to an appropriate ratio for the style of the corresponding platform.
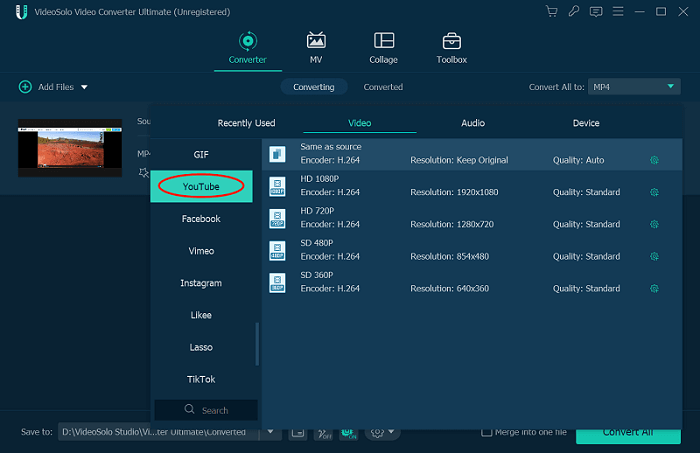
Before exporting the video files, you can change output folder at the bottom. Then click the button “Convert All” to save your video.
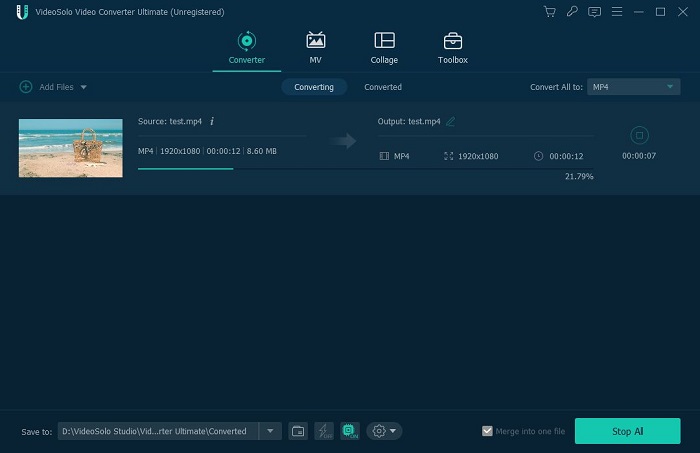
You don't need to worry about the video will copied by others now. The created watermark will be embedded into each frame of your video.
How to Add Watermark to Video in VLC Media Player
As we all know, VLC Media Player is an open-source media player for free. It can also help you add watermark to video. Compared to VideoSolo Video Converter Ultimate, it only supports JPG and PNG for logo/photo watermark. You cannot adjust the color, font style and effect of the text watermark. It's not convenient that there is no real-time window. But it avails when you just need simple watermark editing.
Here is the tutorial on how to add watermark to video by VLC Media Player:
Step 1. After uploading a video file, click on Tools > Effects and Filters in the Menu bar.
Step 2. Turn to Video Effects > “Overlay” tab.
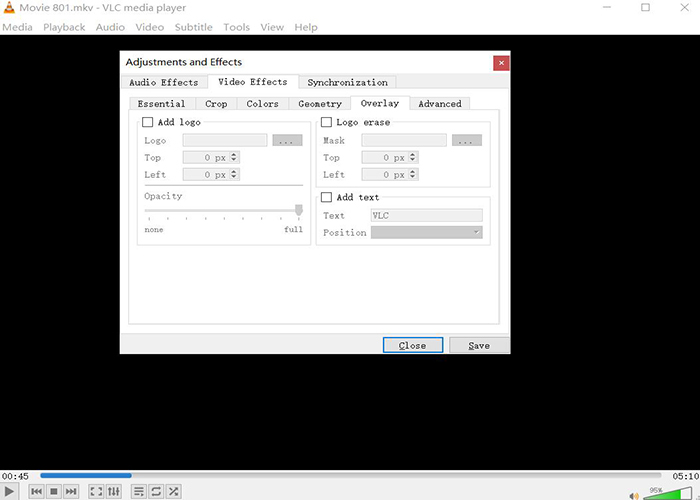
Step 3. Add watermark to video.
Photo watermark: Enable “Add Logo” option and then locate the file. It only supports JPG and PNG.
Text watermark: Enable “Add text” option and then fill in the blank.
Step 4. Turn to Video Effects > “Overlay” tab.
How to Add A Watermark to Video with Mac Built-in Tool iMovie
There is a useful built-in tool for Mac users to add watermark to video – iMovie. With iMovie, you can do some basic and advanced video editing without much stress, such as merging video, splitting video, changing background music of video etc.. Here, we'll show you how to add a watermark to video with iMovie step-by-step.
Add Text Watermark to Video in iMovie
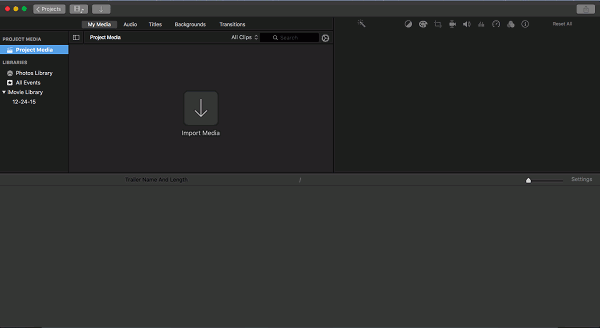
Step 1. Import the video you want to add watermark to into iMovie, and then drag and drop the video on the timeline.
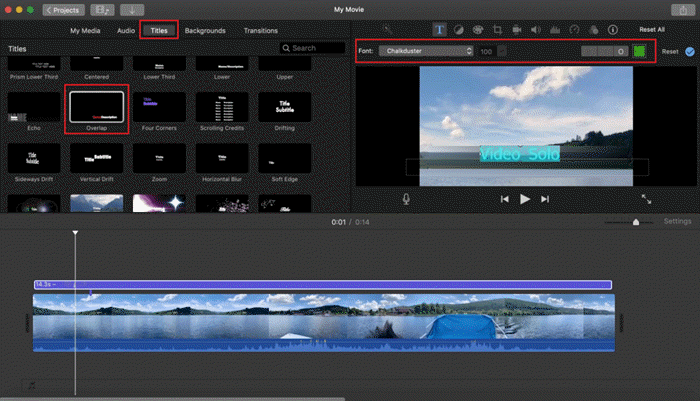
Step 2. Select Titles as the picture shown below. Preview different types of the text effect, and choose the style you like.
Step 3. Double-click on your watermark text choice and it will be loaded into the timeline. Decide when will the text watermark appear and how long it will last by draging the edges of the title on the timeline.
Step 4. You'll find more text options atop the video preview section. And you are able to change font sizes, text-align, and styles from the preview section.
Add Photo Watermark to Video in iMovie
Step 1. Check the properties of the video you want to add the watermark to and the same dimension should be set for the logo/photo you want to use as watermark.
Step 2. Drag and drop the photo watermark above the timeline at the point you want it to appear.
Step 3. If you want the watermark to show in the corner or the part of screen, then click the watermark on the timeline and select Picture in Picture to adjust size and position of the logo.
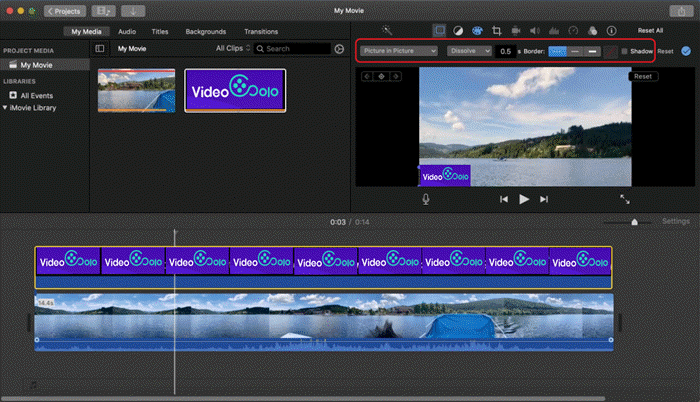
Step 4. If you want the watermark to show in full screen, then select Cutaway from the pop-up window. Adjust Opacity to make your logo watermark transparent.

Step 5. Remember to set the duration of the watermark by dragging its edge in the project browser or from Preferences. Then, you can now play or review your new watermarked video!
How to Add Watermark to Videos with Windows 10 Built-in Video Editor
Actually, windows 10 comes with a built-in video editor that can help you to add watermark to your video, in which also equipped with many other basic video editing tools. However, as it is hidden in the “Photos” App, and you won't find it without a bit of digging, so few people know they have this conveniente tool on their Windows computer.
With this video editor, you can only add a Text watermark to video currently. If you want to add a Image watermark to your video clip, we recommend you to use this multi-function tool – VideoSolo Video Converter Ultimate.
Now, let's see how to find this tool from our computer and use it to add text watermarks to our videos.
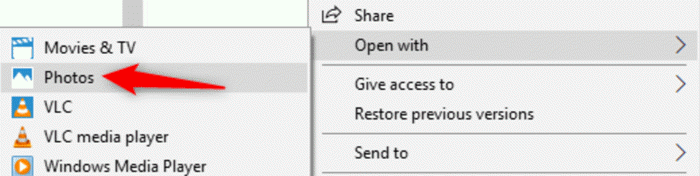
Step 1. Open Windows 10 Video Editor in Photos APP
To edit a video file in Windows 10, open it in the Photos App first. You can do this by right-clicking the video file, and then selecting Open With > Photos.
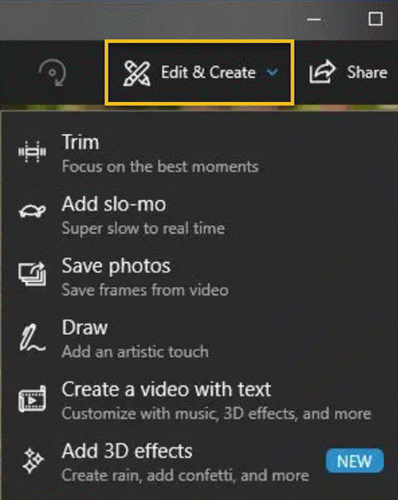
Step 2. Choose Edit & Create in the Photos App
Now, your video will open and play in the Photos App. To edit the video, click “Edit & Create” on the top right corner of the toolbar, and you'll see a variety of video editing tools you can use. Just click the tool you want to use it.
Step 3. Add Text Watermark to Video in Video Editor
For example, to add a watermark to your video, click “Text” in the menu. To use the Text tool, simply type the text you want to show in the watermark in the text edit box. And then, you can choose the animated tect style as you like in the menu bar on the right side of the interface. Also, you can decide where you want to paste your watermark, when will it appear in the video and how long will it last for.
When you're done, click “Done” and then “Save a Copy” to save a copy of the video with a text watermark. To stop editing without saving your changes, click “Cancel” instead. The Photos App will place the edited video in the same folder as the original with a similar file name.

For fast and simple single-clip editing, you can use the Windows 10 Built-in Video Editor App. If you want more options and more complex videos, Microsoft has added Clipchamp to the Microsoft family, which can also help you to add watermark to video with even more editing tools, and you can find it in Microsoft Store.

Add a Watermark or Logo to Your YouTube Videos (Official)
If you run a YouTube channel, and for copyright reasons and branding purposes, I'm sure sooner or later you'll want to watermark all of your channel videos with the same watermark. To meet this need, YouTube itself generally carries a “Branding” option where you can brand your video with your channel. With just a few clicks, you can add a custom image to every video on your channel.
The Branding feature is only available to YouTube accounts that are in good standing, meaning that you haven't earned any copyright strikes, DMCA takedown notices, community warnings, etc.
This function is very convenient and practical, because:
- If you ever want to change your branding image, you only need to update the Branding settings and all of your videos will apply to the new watermark.
- Your source videos can remain watermark-free in case you ever want to repurpose them for something else.
In order to enable Branding, you need to:
Step 1. Log in to your YouTube account, and then navigate to the YouTube Studio page on YouTube.
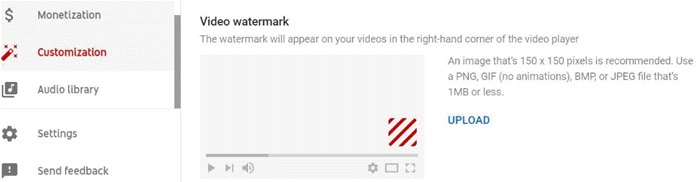
Step 2. Click Customization in the left sidebar and then click the Branding tab.
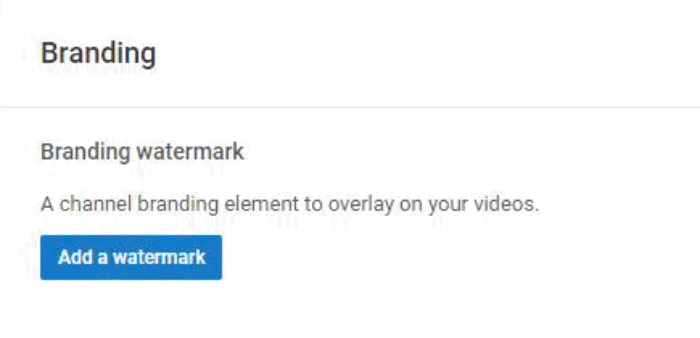
Step 3. Click Upload and select the image you want to use as watermark for your YouTube videos.
Step 4. Select when you want the image to start showing and for how long you want it to stay in your video. During your video, the watermark will appear as a small image in the bottom right corner of the video. Once other viewers click on it, they will then be directed to your channel.
Conclusion
Nowadays, when you share your videos on the web, anybody can download and reuse them in their own projects. While you can't fully prevent that from happening, you can at least let the viewers know who your video actually belongs to by adding a simple watermark.
Above are the 5 ways to add watermark to video with detail steps. As we can see, VideoSolo Video Converter Ultimate is more convenient and useful in adding watermark to video. It can help you add both text watermark and photo watermark to your video and even make watermark more personalized. Besides, it's versatile in basic video editing and video/audio conversion. Just click the button below to downlaod a free version to have a try!

