In order to distinguish pure audio MP4 file and MP4 file containing videos, Apple uses “.m4a” to name pure audio MP4 file. That's to say, the main difference between MP4 and M4A is M4A can include MP4 audio only.
If you just want to play the audio in MP4, converting MP4 to M4A is a great choice. M4A has good compatibility that Apple devices, Android, Windows phone, computers are all supporting to play it. In this article, I will introduce two useful methods to convert MP4 to M4A. They are easy to learn.
Ultimate Guide: Convert YouTube to M4A on Windows/Mac
Rename the Filename Extension from MP4 to M4A
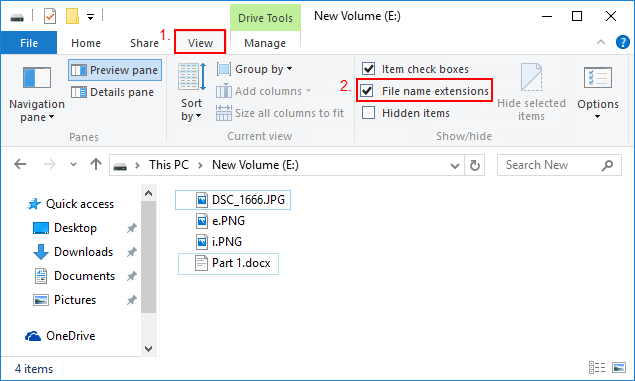
Step 1. Show File Extension Name On Windows
Open file explorer, and then check “File name extensions” in the “View” panel.
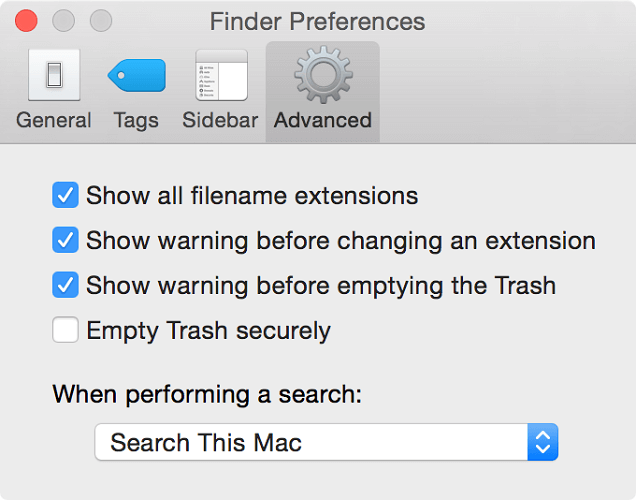
Step 1. Show File Extension Name On Mac
Check “Show all filename extensions” in “Finder Preferences”.
Step 2. Simply change .mp4 extension to .m4a.
This method is convenient but there's a big problem — the video is still there. You got a playable M4A file, but the file size is exactly the same as the original MP4 video because by simply changing the extension, the video won't be removed. How to fix this? Keep reading, this question will vanish.
Use an MP4 to M4A Converter to Extract the Audio from MP4
To get an audio-only M4A file, you will need an MP4 to M4A converter. VideoSolo Video Converter Ultimate is an excellent converter with fast conversion speed and stable converting process. It not only allows you to convert MP4 to M4A but also supports you to convert multiple digital formats like MP3, MKV, AVI, etc. Go beyond this, there provide a “Media Metadata Editor” tool which made this converter become top-level, you can use it to edit the media file info you want.
Feel free to download the proper version on your Windows or Mac. Now let's see how it works.
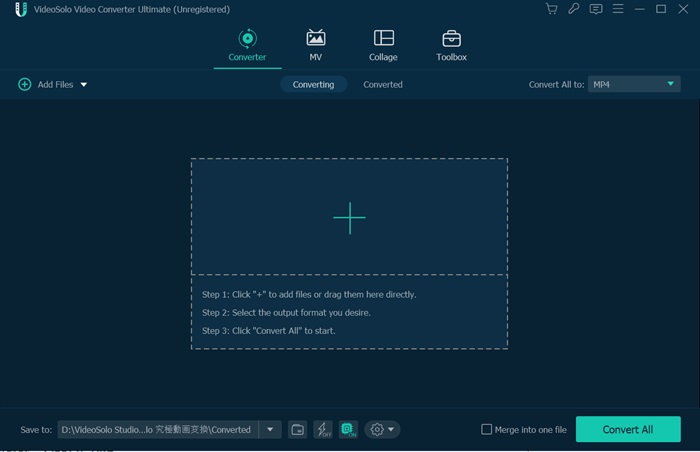
Step 1. Add MP4 Video to the Converter
Click the “Add Files” option or directly drag the MP4 video(s) into the program. Remember that your MP4 video must contain audio track because M4A is an audio format.
Step 2. Choose an Output M4A Format (Important Step)
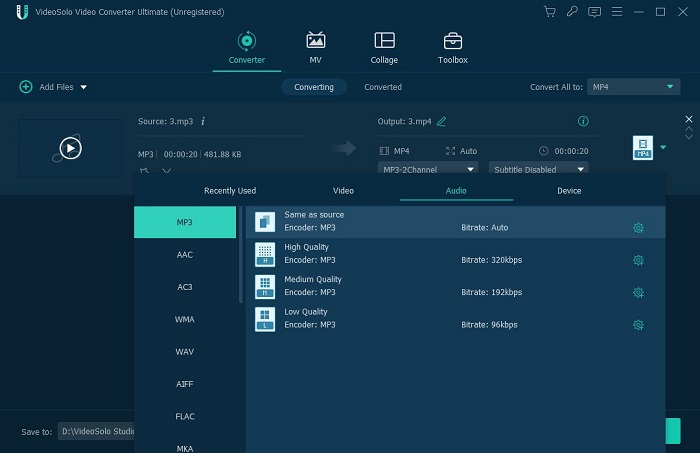
After importing the MP4 video that ready to convert, click the pull-down menu beside “Convert All to”, select the “Audio” tab at the top bar, and locate on “M4A”. Here you can find four selections.
1. Same as source – Keep the original quality.
2. High Quality – Change the bitrate to 320kbps.
3. Medium Quality – Change the bitrate to 192kbps.
4. Low Quality – Change the bitrate to 96kbps.
Moreover, these four selections all can customize output profile you want. You just need to click the “Custom Profile” icon to set the desired audio parameters.
I tested a 16.2MB MP4 video on my computer. When converting to the first one, the converted M4A file is only 651KB. When converting to the second one, the converted M4A file is 6.85MB. This is a lossless conversion that completely extracts audio from the MP4 video. Choose a suitable one according to your needs.
Step 3. Fast Convert MP4 to M4A
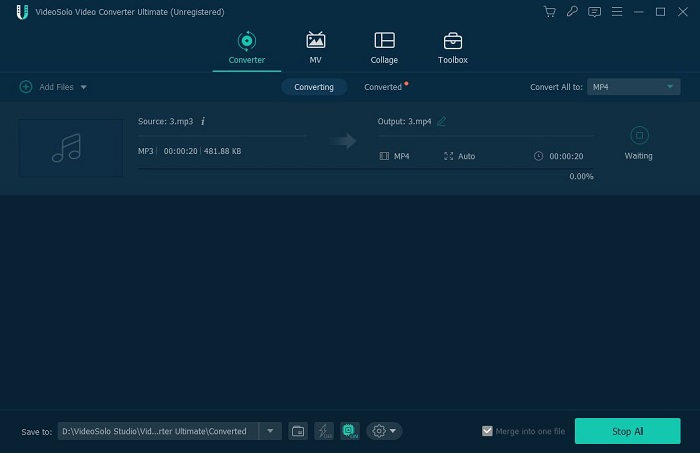
Once output settings are done, click the “Convert All” button at the lower right corner and start conversion. VideoSolo Video Converter Ultimate will convert selected MP4 video into M4A audio. This can be done quickly if you enable NVIDIA, Intel, or AMD hardware acceleration in the program. The conversion page will show you the total progress, elapsed time, and remaining time. You can pause or stop the conversion. When the conversion is complete, you can go to the “Converted” box to find the converted M4A file.
After reading this article, do you know how to rename .mp4 to .m4a, or utilize VideoSolo Video Converter Ultimate to extract the audio from MP4 as M4A format? I believe that mastering these two ways can help you get the M4A files that suit you best. Just have a try by yourself, and you will realize how useful they are.