Do you meet the problem that you fail to import YouTube video into iMovie for editing? While most of the time, you can directly put your downloaded video to iMovie successfully. So why? It's actually because the Apple's iMovie can't support some of the YouTube video formats.
In the next part, you'll know which formats are incompatible with iMovie and how to convert these YouTube video to iMovie supported format.
Why You Fail to Import YouTube Video to iMovie
First, YouTube doesn't provide a way to download videos from its website. But it allows users to upload video in MOV, MP4 (MPEG4), AVI, WMV, FLV, 3GP, MPEG-PS, and WebM. Usually, most third-party YouTube downloaders can download these videos to the original formats above.
However, looking at the iMovie supported formats, we can find that it's only compatible with certain video formats including 3GP, AVI, M4V, MOV, and MP4. That means that YouTube video formats like WMV, FLV, 3GP, MPEG-PS, and WebM are not supported by iMovie, and that's often the reason why you fail to import videos. (Sometimes it may be also concerned with the video codec.) The most effective solution is to convert the incompatible YouTube videos to iMovie-supported formats, and you can get the idea from the guide below.
How to Convert Downloaded YouTube Video to iMovie
There are various kinds of converters for you to convert and put YouTube videos to iMovie for editing. VideoSolo Video Converter Ultimate is a strongly recommended one. Compared to similar products, it has 6X faster conversion speed, because it boasts GPU acceleration technology including NVIDIA CUDA, NVENC, AMD, and Intel. By using this YouTube to iMovie converter, you can easily and quickly convert any YouTube video to iMovie supported formats.
Besides the fast conversion speed, the converter itself provides a bunch of useful video editing features, enabling you to rotate, crop, trim or merge videos, change the video resolution, compress it into a smaller size without quality loss. Using the tool itself can you quickly finish some video editing tasks.
Now let's see how to use the YouTube video converter to help yourself out of the incompatible problem.
Step 1. Download VideoSolo Video Converter Ultimate
Get the Mac version downloaded and installed and prepare your YouTube videos to be converted.
If you haven't got a downloaded YouTube video, you can check the download method at Part 3.
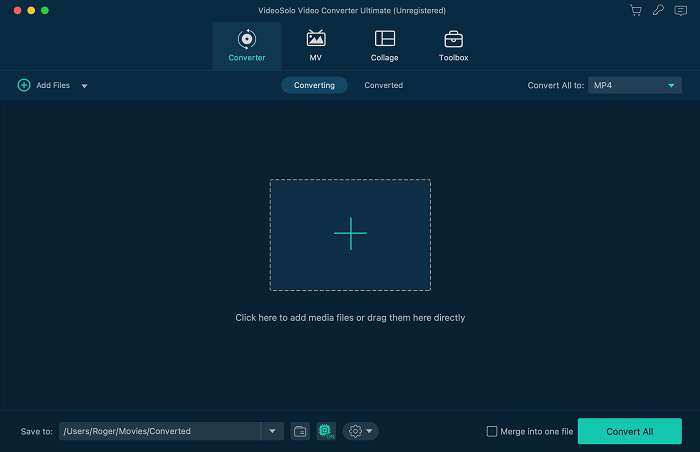
Step 2. Add YouTube Videos to the Application
Click the “Add Files” button to import your downloaded YouTube video you wish to convert. Since batch conversion is supported, you can add multiple files for your conversion.
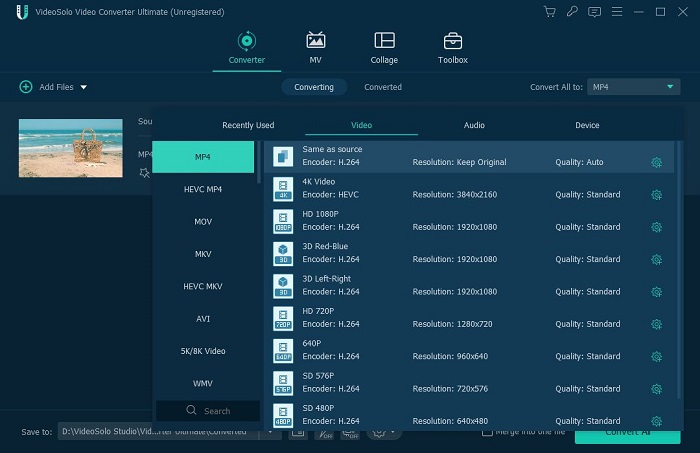
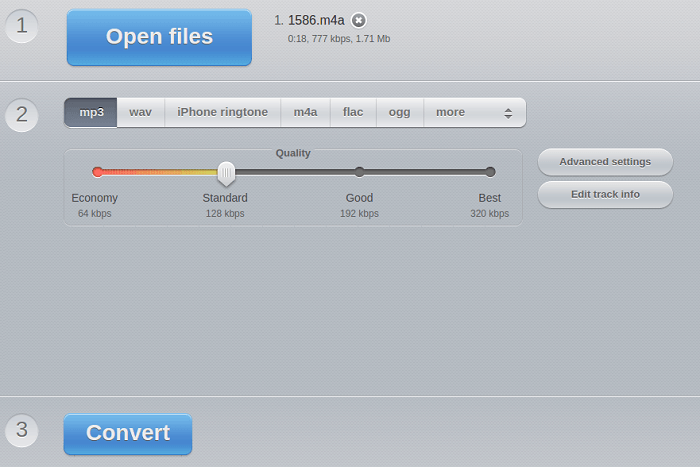
Step 3. Choose the Output Video Format
Browsing the output formats list, you can select the video output formats such as MP4, MOV to convert your videos since MP4 and MOV are supported by iMovie.
Also, you can directly choose the format in “iMovie” and Final Cut Express, which work best with iMovie.
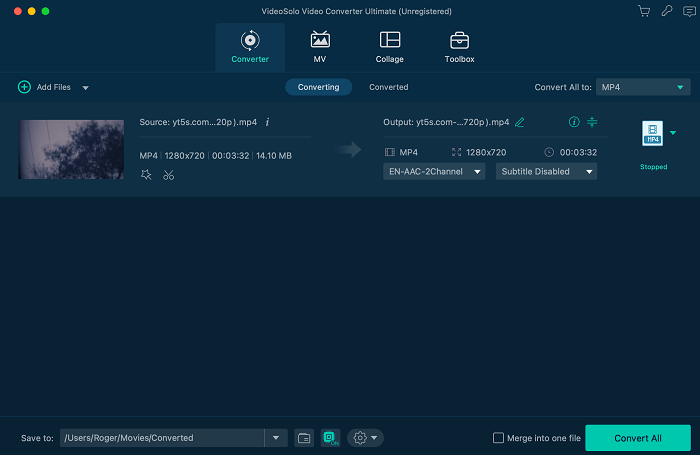
Step 4. Convert the Downloaded YouTube Video
Click the “Convert” button and then a conversion interface will open up to show the process of your video conversion.
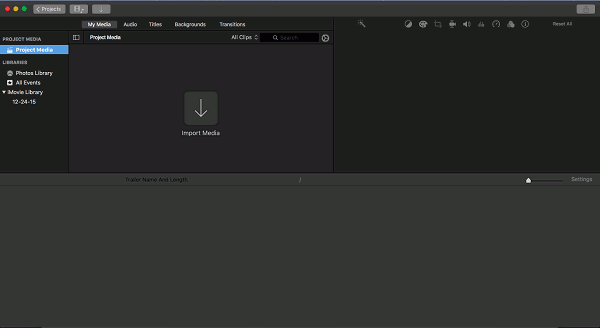
Step 5. Put YouTube Video to iMovie
After the conversion ends, you can launch the iMovie on your Mac and click “File” >”Import”to import the converted YouTube videos to iMovie. Do the editing you want now!
Now, download Video Solo Video Converter Ultimate and begin converting the Youtube video to iMovie.
Use Online Video Converter to Convert YouTube Videos
Some of you may wonder if there is an online free way to convert the YouTube videos into iMovie formats. Here we will also provide an option to you.
This online video converter has got an intuitive interface and you can easily follow the instructions on the website to do the conversion. But this way requires you to have a stable Internet connection, and the video file cannot be too large (limited to 30 minutes or so, or the conversion may take hours).
Here's how to convert the YouTube videos into iMovie formats with this online program:
STEP 1. Choose “Open file” to add the YouTube video. This online tool allows you to add files from your Google Drive, Dropbox, or an URL, but directly pasting a YouTube video link is unworkable.
STEP 2. Set up the output video format you prefer. For example, you can choose MP4, and then tap “Settings” to customize more if you need.
STEP 3. Click “Convert” and wait for some time to get the video and import it to iMovie.
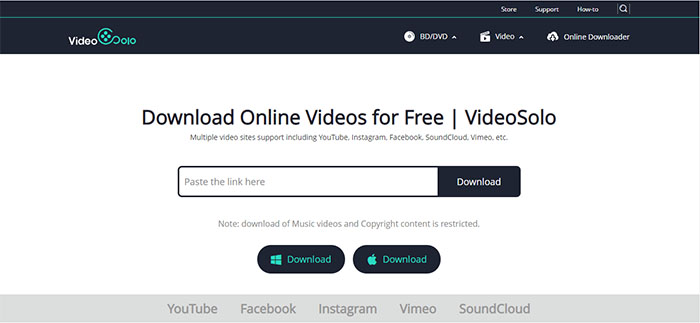
Expand! A Free YouTube Video Downloader Recommended
Actually, you can directly download the YouTube to iMovie supported format to avoid this problem. The most common used format and supported by iMovie is MP4. Here, we share an online YouTube downloader to help you download YouTube to MP4.
VideoSolo Online Video Downloader, has intuitive and clean interface. It doesn't have any ads and virus. You only need to copy and paste the URL of YouTube video to its search box and click “Download” to analysis the video. After it has shown the optional formats and quality type, click the green “Download” to start downloading. Just have a try if you need.
Now, you have already known how to put your YouTube video to iMovie successfully. Hope you can edit your YouTube videos in iMovie better after reading this guide. Don't forget to give us a thumb if you think this guide is useful to you.

