It is tough to create impressive videos without utilizing some personalized effects as the world has moved to share the ideas in the form of video. While editing the videos, there must have some circumstances when you need to speed up or slow down the video speed to make them look more dramatic and impactful. Replacing those complicated video editing apps, today's post will mainly focus on some easy-using programs that can help you easily change video speed on PC/Mac. Let's move to see who them are and how to manipulate now.
Easy Way to Speed Up or Slow Down Video on Windows/Mac
Now we come to the first recommended editing program, VideoSolo Video Converter Ultimate. This is a desktop-oriented program designed for Windows and Mac users to convert and edit videos with the smooth performance and easy manipulation. To facilitate the effortless user experience, VideoSolo Video Converter Ultimate is developed with the simplest editing toolkit that people can process the video editing with one-shot. To change video speed with this program, you only need to process several easy clicks.
Furthermore, VideoSolo Video Converter Ultimate also provides more than 1,000 encoders covering all popular ones for you to export the edited videos, in that you can transfer them to any device or platforms for playback or uploading. Better still, this multifunctional program is equipped with more video handy and helpful tools like the Video Compressor, Media Metadata Editor, MV Maker, and so forth to assist people creating incredible videos in personal preferences.
The handy video speed changing function provided by VideoSolo Video Converter Ultimate won't cost more than 3 minutes to process. Now, please follow the easy procedures described below to master the way to speed up or slow down video speed utilizing VideoSolo Video Converter Ultimate.
Step 1. Add Video to VideoSolo Video Converter Ultimate
First, as you have installed VideoSolo Video Converter Ultimate on PC/Mac, launch the program and open the Toolbox module. Here, you can access multiple videos editing tools, including Video Speed Controller. Select it and subsequently click on the large + in the middle to browse all local folders and select the video to add to the program. Besides, it is also supported to add video through dragging the file to the interface directly.

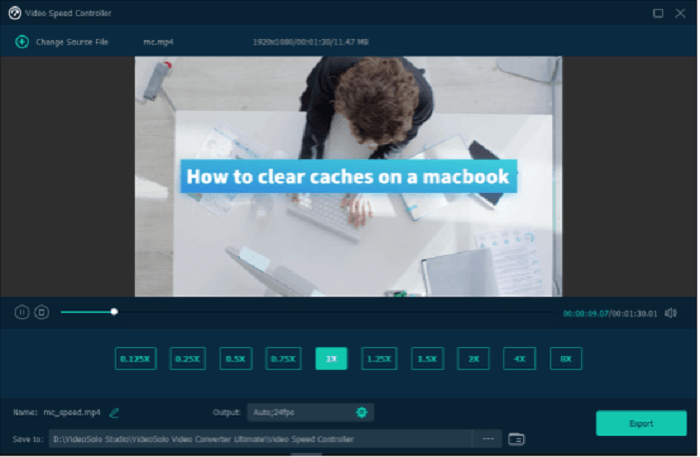
Step 2. Select A Video Speed to Change the Video
VideoSolo Video Converter Ultimate offers preset options to change the video speed directly. Simply select one and preview from video previewing window to confirm the video effect after changing its speed.
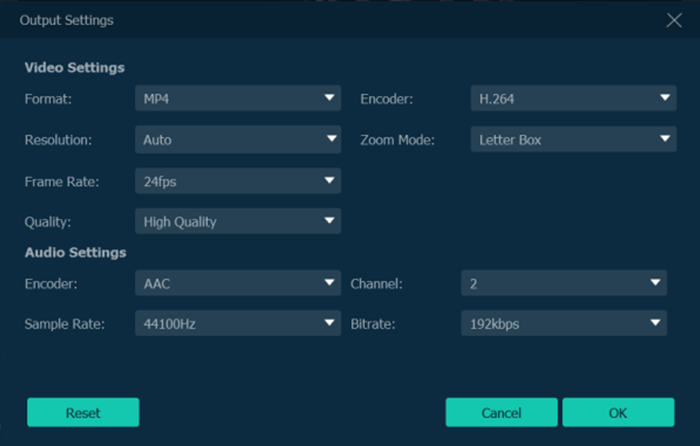
Step 3. Configure Video Settings
Subsequently, as you have well changed the video speed, you can move to Output and customize the video settings such as the format, quality, SampleRate, Bitrate, and more to export the video in personal preferences.
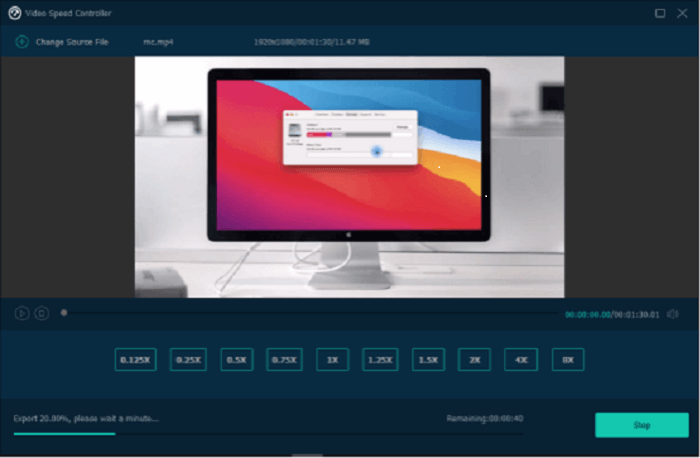
Step 4. Export Video to Local Folder
Eventually, one tap on the Export button to proceed to export the video now. Please wait for a moment and VideoSolo Video Converter Ultimate will complete saving the video to the local folder for you.
Change Video Speed on Mac Using iMovie
For macOS users, a more effortless path to change video speed should be utilizing iMovie, as you won't need to waste time in sorting the best video editing program for yourself in advance from hundreds of options. Of course, as a built-in feature on Mac devices, iMovie is entirely free to use, but it can still guarantee the best resolution to export videos as Apple would always maintain its service with the industry-leading quality and efficiency. Now, don't miss the handy guide on changing video speed utilizing iMovie on Mac.
1. Launch iMovie app on Mac. From the main feed of the program, switch to Projects and click on the + module to create a new movie project.
2. Once the new project is created now, add the video you wish to change its speed to the project by dragging the file to the timeline.
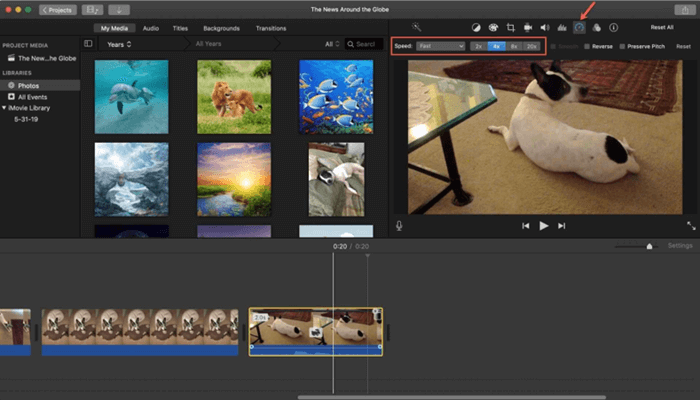
3. Select the video, then the editing toolbar would appear. You should tap the Speed icon in order to adjust the video speed.
4. iMovie provides personalized options to adjust video speed, such as to speed up the video by selecting Fast and then the speed up rate at 2X, 4X, 8X, 20X. Simply adjust the video speed here in your preference.
5. When you have selected an option to change the video speed, a slider would appear on top of the video to let you further customize the speed.
6. Once the editing is completed, please turn to File >> Share >> File…to export the newly created video with slower or faster speed locally on Mac.
Adjust Video Speed on Windows with Photos App
Similarly, as iMovie is for Mac, Windows users also get a built-in video editor which is available to customize the video speed. That is the Photos app. Like iMovie, Photos is an embedded function that is pre-installed on Windows computers, moreover, it is entirely free to use. In the following, try adjusting the video speed on Window utilizing Photos without third-party programs or add-ons installed.
1. First, please launchPhotoson Windows computer. Then switch to its built-in Video Editor and click on the Add button to upload the video file to the program.
2. When the video is imported, you will directly head to the editing window. Subsequently, tap the Speed button and adjust the speeding bar to customize the video speed as you wish.
3. Photos allows people to preview the video editing effect with the provided previewing window. As you have checked the speed of the video is well adjusted now, directly tap the Finishbutton and export it.

How to Speed Up or Slow Down Video Online
The advent of all types of online tools greatly facilitates the convenience of cross-platform files management. To change video speed, there are also some reliable online platforms providing the high definitions and effortless experience to speed up or slow down videos in easy manipulation. If you gonna find a way to change video speed online without utilizing third-party programs, InVideo is a rational option. This easy-using online tool has simplified the video editing process, making it an effortless job to speed up or slow down the videos within easy procedures. You can walk through its manipulation now.
Please open the InVideo official website and sign up an account to log in. Subsequently, go to Blank Canvas >> Make a Video >> Upload Media to import a video for editing.
When the video is imported, InVideo would allow you to trim the video before adjusting the video speed. You can skip this procedure by selecting the whole video to import.
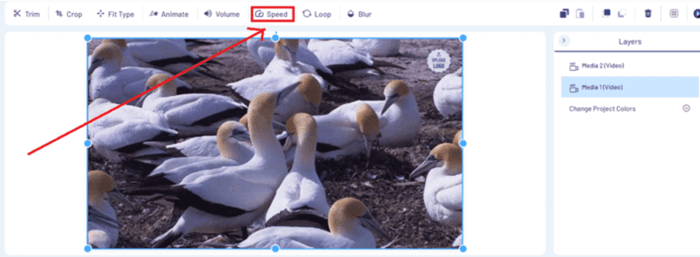
Subsequently, select the Speedfunction from the top editing toolbar. Now you only need to drag the pointer to adjust speeding up or slowing down the video in your preferences.
Once the speed adjustment completes, please confirm to Download & Share >> Export >> Download to save the video locally from the web.
Conclusion
Every video creator would have the time when he/she has the time to adjust the video speed by speeding up or slowing down it. From this post, you have mastered the 4 simplest paths to change the video speed. For me, my favorite is VideoSolo Video Converter Ultimate, because besides adjusting the video speed, it has many other functions, such as adding watermarks to videos, removing watermarks from videos, removing noise from videos, cropping videos, adding filters to videos, etc. It is an all-in-one utility. Next time when you are running into the circumstance and need to speed up or slow down your videos, directly select the most convenient method here to process it in an effortless way!

