Have you ever met problems like don't know how to cut or trim the unnecessary part of videos on Mac? If you want to make a professional or perfect video, cutting, trimming and other basic editing is necessary. In this article, we are going to introduce 4 simple and effective methods of trimming video on Mac, bonus tips on how to make a more professional video will also be given, let's check it out!
Trim Video with VideoSolo Video Converter Ultimate [Recommend]
VideoSolo Video Converter Ultimate is an easy-to-operate and professional tool for trimming video and do other basic video editing. This software will help you trim MP4, MOV, AVI and other types of videos into split or join video segments. Unlike many other trimmer and editing tools, VideoSolo possess versatile features like rotate& crop, split& merge, enhance video quality and add or remove watermark of a video effortlessly.
While you're trimming the movie, it will bring up a real-time preview window that lets you see how the movie currently looks, avoiding being unhappy with your trimmed video. After all, it allows you to convert video between more than 300 video formats with high output quality at 6x faster converting speed.
Here are the steps to trim your videos.
Step 1. Download VideoSolo Video Converter Ultimate on Your Mac
Click on the button below to download the version for Mac, then launch it.
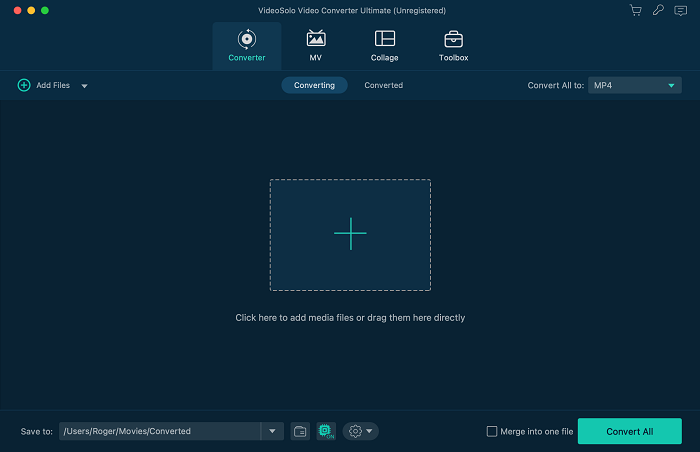
Step 2. Add Video Files You Want to Trim
Once you downloaded the software, open it. You will see a main interface with “Add files” button on the top. You can also drag files from the computer to the interface.
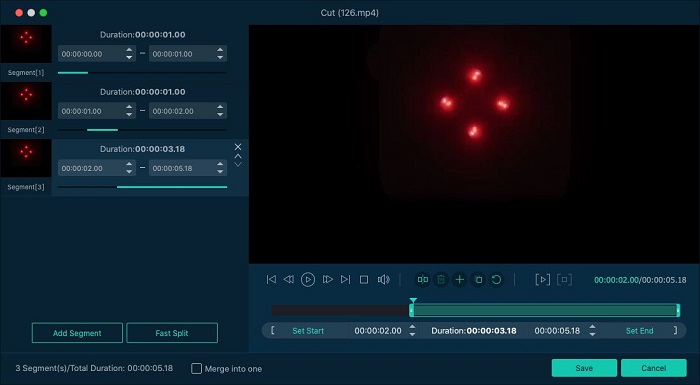
Step 3.Trim Video
Once you add file to the main interface, click the scissors button under to the film in the program to cut videos. In the editor, you can Cut the long video to the length you want by dragging the progress bar. Or you can set the start time and end time manually. Here you can delete the selected segment and keep others, options are also provided to fast split and merge video clips into one.
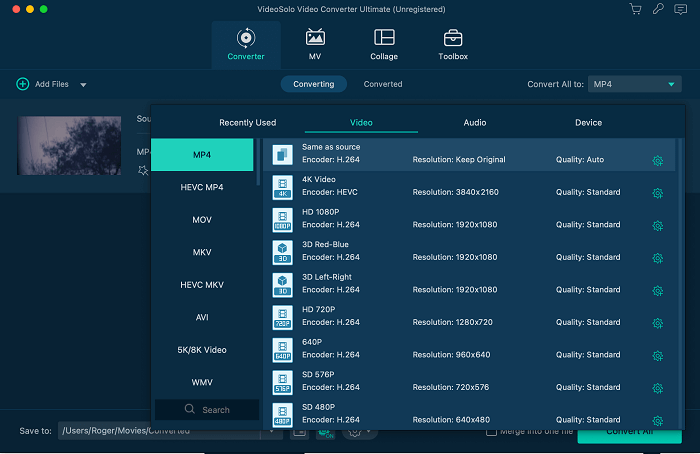
Step 4. Specify the Output Format
Click the drop-down icon of “Output Format” and select a video format as you like.
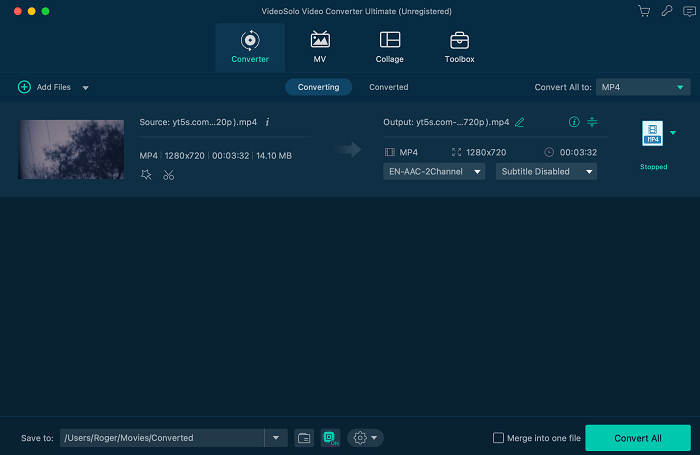
Step 5. Export the Video
After that, click “Convert All” button to export the video. You will find your videos in the converted section.
Bonus Features to Edit Videos on Mac/Windows
For users who desire to edit videos for more professional way, finding another video editor would be troublesome, and more importantly, more expensive. A bonus feature for VideoSolo Video Converter Ultimate users should be its built-in video editing functionality. Users are able to make full use of them to customize the videos before converting 4K to 1080p.
The core editing features provided by VideoSolo Video Converter Ultimate include:
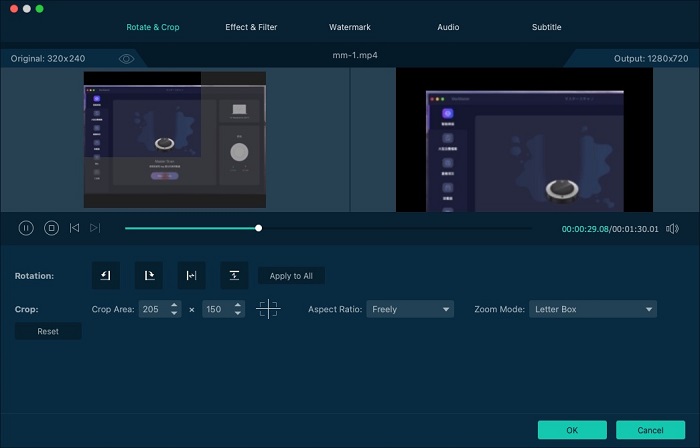
- Rotate & crop:available for adjusting the video angle and its frame size by simply rotating or cropping it;
- Split & merge:cutting a long video into parts or merging several video clips into a single video;
- Watermark:text and image watermarks are available to be inserted into the video;
- Add subtitles:add subtitles to the video for interpreting the content directly;
- Effect & filter:select filters from 50+ presets to embellish the video, meanwhile, adjust the contrast, saturation, brightness, and hue with ease.
- Video Enhancer: remove video noise, reduce video shaking, optimize brightness and contrast, and upscale resolution.
Trim a Video Clip by using QuickTime Player on Mac
QuickTime Player is a default option for a lot of Mac users when it comes to play video and do basic video editing. With QuickTime Player on Mac, you can trim and rotate your video clip effortlessly. If you don't want to download any third-party software and save your time and money, then QuickTime Player is the perfect option for trimming video.
Step 1. Launch QuickTime Player and open the file you want to trim
Click File on the menu bar, then choose Open File to open the video file you want to trim.
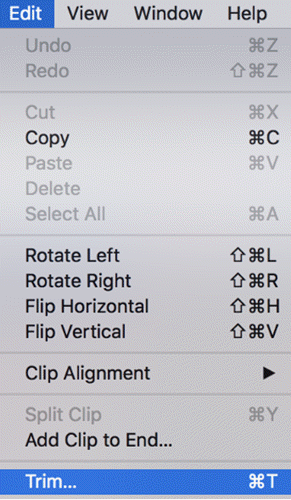
Step 2. Trim your video
Go to the “Edit” menu and click on Trim. Drag the yellow handles in the trimming bar to select the portion of the clip that you want to keep. To make more precise edits, click and hold a handle to see individual frames of the clip.
Step 3. Save and export trimmed video
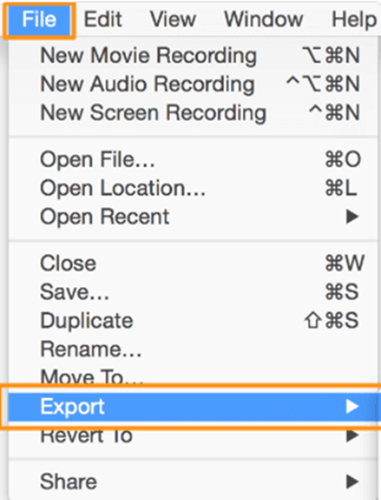
After selecting the desired part, click on Trim. Then go to the File menu and click Export to output the trimmed video on Mac.
Compare with VideoSolo Video Converter Ultimate
QuickTime Player is a convenient option for Mac when it comes to basic trimming video. However, it is worth mentioning that you can only cut out unwanted content at the beginning and end of a video but cutting out the middle part is not supported in QuickTime Player.
In this case, VideoSolo have more advantages if you need to delete some unwanted segment and keep others, not to mention VideoSolo has other more features like rotate and crop, split and merge, add filter and enhance video.
How to Trim Clips in iMovie on Mac
iMovie is another built-in application developed for Apple device users to edit videos as well as audios with great resolution and sound quality. It allows even beginners to edit their video clips with little practice. It's more versatile than QuickTime Player, not only can it trim and cut the unwanted part of video, it can also add music and effect, clean background noise from your video.
Step 1. Upload Video Files You Want to Cut into iMovie
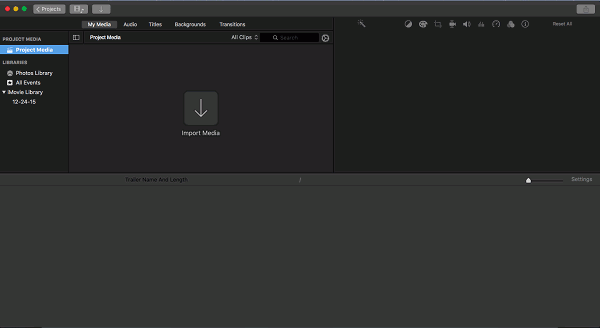
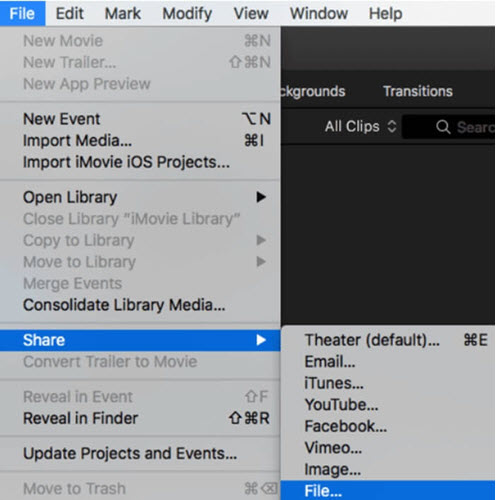
Open the iMovie App on your Mac. Click “File – Open Project” and select the project you wish to work with. Then select “Import Media” to import the video file that you want to trim in iMovie.
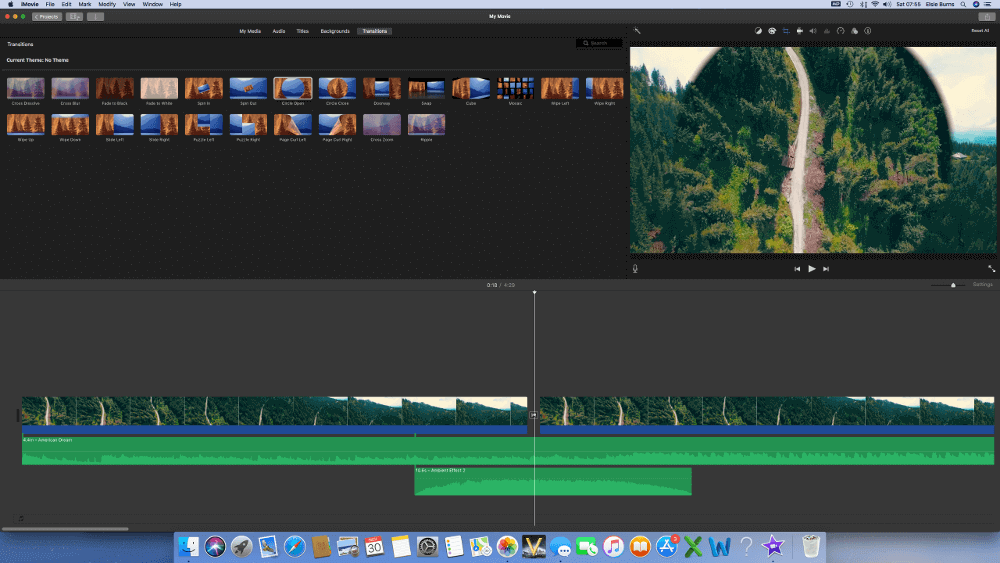
Step 2. Trim Your Video
Click and drag directly the head or the end of video on the timeline to trim it. Or you can move the cursor to the right position and right click on it, choose “Trim To Playhead“. Or you can select “Show Clip Trimmer” to trim your video. With Clip Trimmer, you need to click on video and move the cursor to trim the head and the end of video.
You can delete the one you don't need. Click on the video on the timeline that you want to delete and press the “Delete” button. Go to the “Modify” menu and click on Split Clip, this will split the video.
Step 3. Export Trimmed Video
After finishing the trimming of your video, you can export the video clips and save it to your desktop, or you can directly select to share the created video through social media platforms.
Compare with VideoSolo Video Converter Ultimate
Although iMovie is much useful than QuickTime Player for Mac users, for advanced editing, its functions are still limited. If you are seeking a more professional video editing tool for a big project, VideoSolo could be the best alternative. It has all the best functionalities for you to edit your video, you can easily use this software to make great video, edit audio, and even convert the video file into 1000+ formats.
How to Cut Video in VLC Media Player on Mac
VLC Media Player is a totally free, open-source video player, which works on all the popular platforms. This software allows users to play videos in nearly any format, and it also has simple video editing functions. With VLC, you can edit or cut your video without complicated process.
Trimming video on VLC is pretty straightforward, let's follow the steps to learn how to trim video in VLC on Mac.
Step 1. Download VLC Media Player and Add Video to the Playlist
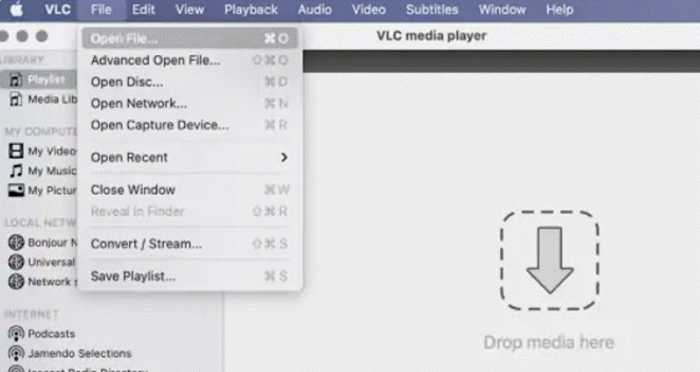
Download VLC Media Player, then install and open it. Drop or drag the file you want to trim into your VLC playlist, you can also click the File dropdown menu at the top of the player and then click Open File.
Step 2. Trim Video in VLC
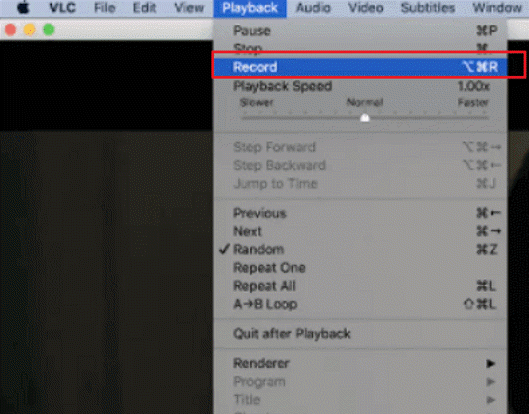
Find the starting point in your video where you want to trim and pause the video by hitting the space bar on your keyboard. Then click Playback at the top of the menu bar and choose Record button, press the spacebar again to resume the playback.
When the play head reaches the desired end point, pause the video and click the Record option again.
Step 3. Find Your Trimmed Video
Your trimmed file will be located in you Movies fold by default, you can also change the location by clicking Preferences.
Compare with VideoSolo Video Converter Ultimate
VLC media player is free software that offer a lot of functions, however, it is only suitable for people who only need simple trim. If you want to remove unwanted section of the video or split video into several section, unfortunately, it is not supported by VLC.
If you find VLC can't meet your satisfaction, VideoSolo as your alternative. With VideoSolo, you can cut, trim and split videos precisely to the second, crop video into different aspect ratio, extract audio from video, or add subtitles, and so on.
Comparative Table of 4 Methods on Trimming Video on Mac
| VideoSolo | iMovie | QuickTime | VLC | |
|---|---|---|---|---|
| Basic trimming | √ | √ | √ | √ |
| Split video | √ | √ | × | × |
| Delete any part of video | √ | √ | × | × |
| Versatile editing tool | √ | × | × | × |
| User Friendly | √ | √ | √ | × |
| Overall rating | ⭐⭐⭐⭐⭐ | ⭐⭐⭐⭐ | ⭐⭐⭐ | ⭐⭐ |
Conclusion
Trimming video can no longer be an annoying task if you find a video trimmer. If you are looking for a video editor with additional features besides trimming, VideoSolo Video Converter Ultimate is a perfect tool for both beginner and professional that allows you to edit videos in any way that you see fit. Click the button below to download this powerful tool to your computer and start now!

