When video sharing becomes a trend today, people's demands on editing videos also increase greatly. One of the mostly used video editing functionality should be video trimming, which enables people to adjust the video duration without hassle. As there have been countless video editors on the market that can provide such help, this blog tests and collects the 5 simplest methods to trim video on Windows 10. Now, let's go through them one-by-one.
How to Trim Video with the Best Video Trimmer for Windows 10
To edit videos in a simple but high-quality way, VideoSolo Video Converter Ultimate is the top 1 pick for Windows 10 users. The software is able to be perfectly compatible with Windows 10 system. With its cutting-edge Ultrafast Conversion and Blu-Hyper technologies, VideoSolo Video Converter Ultimate would only take low CPU, but accelerated speed to process the long-video trimming without dragging down your device performance. Despite this, VideoSolo Video Converter Ultimate also empowers the following highlighted features attracting global users:
- Intuitive user interface to enable easy-to-grasp video editing functionality;
- Over 1,000 formats to output well-edited videos/audios;
- High resolutions like HD, 4K, 5K, and up to 8K Ultra HD supported to output videos;
- 50X faster conversion speed to boost video editing and converting processes for saving time;
- More tools to help manage and enhance videos professionally;
- Create compelling MVs and GIFs with the well-edited videos in one click.
Now, let's get started with the guide to check how to trim video on Windows 10 via VideoSolo Video Converter Ultimate.
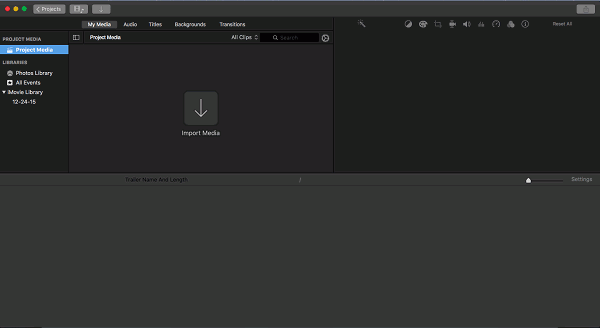
STEP 1. Upload Video to VideoSolo Video Converter Ultimate
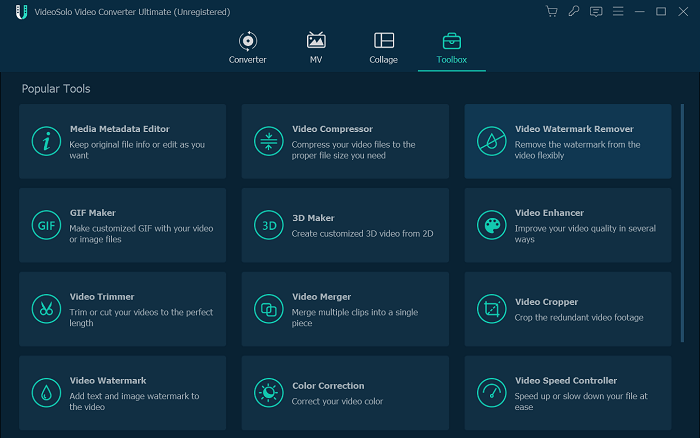
After the software installation, launch VideoSolo Video Converter Ultimate and navigate to “Toolbox”. Open it and directly hit the “+” icon to browse the folder to import the video right away.
STEP 2. Trim Video in VideoSolo Video Converter Ultimate
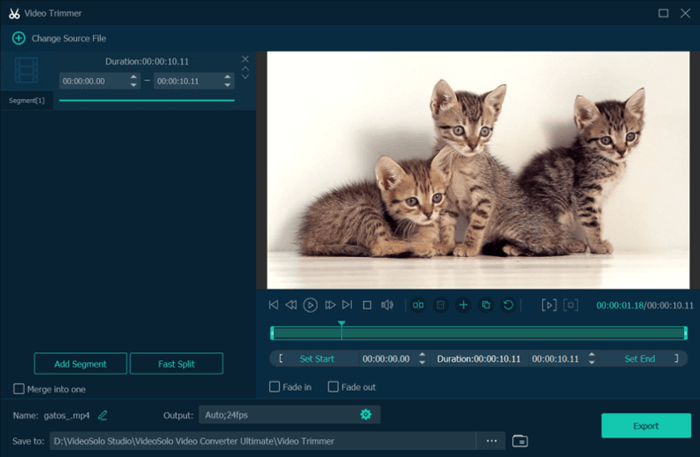
After adding the video to the video trimmer, you are able to customize the start and end time to trim the video directly. In addition, it is supported to adjust the video duration using the timeline for trimming it with ease.
STEP 3. Export Trimmed Video
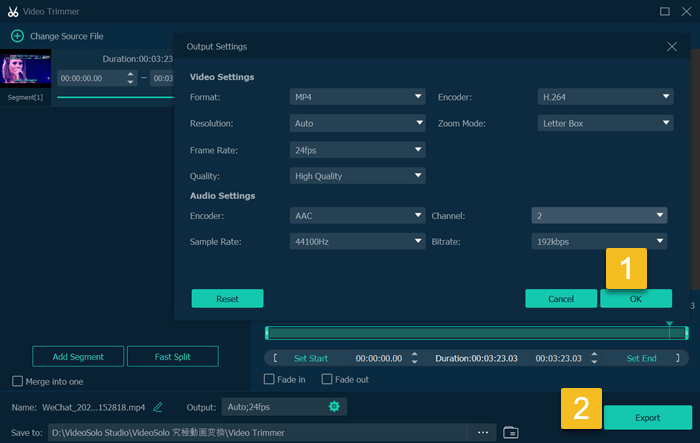
When the video trimming process completes, rename the video, adjust the output settings, and also select the folder to save it. After that, directly hit the “Export” icon and the trimmed video can be saved on your desktop.
How to Trim Video on Windows 10 via Built-in Photos App
On Windows 10, the built-in Photos app also provides the free video editing functionality, with the easy-to-grasp video trimmer to help users easily trim videos without paying a penny. Within only several easy clicks, the video trimming process can be completed with ease with the help of Photos app. Now, let's check this brief guide to see how it performs to help:
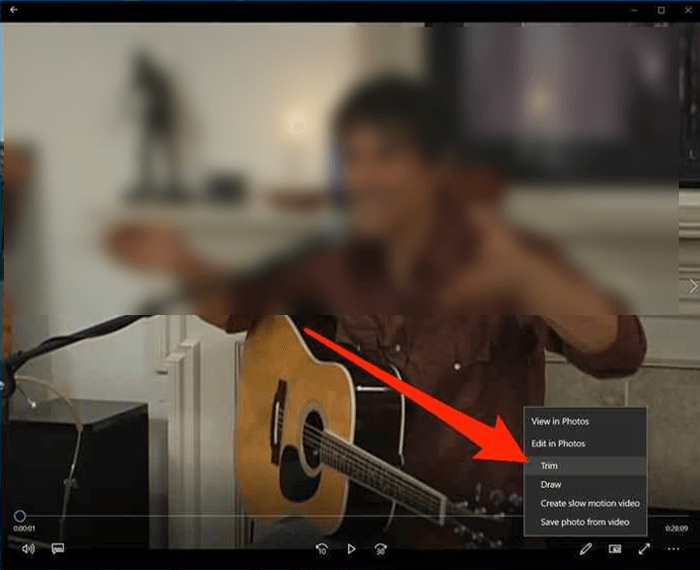
STEP 1. Open Video to Prepare Trimming in Photos
On Windows 10, launch Photos and navigate to the “Video Editor” on the main interface. When a window pops up, submit to create a “New video project” and select to open the video you desire to trim.
STEP 2. Start Trimming Video in Photos
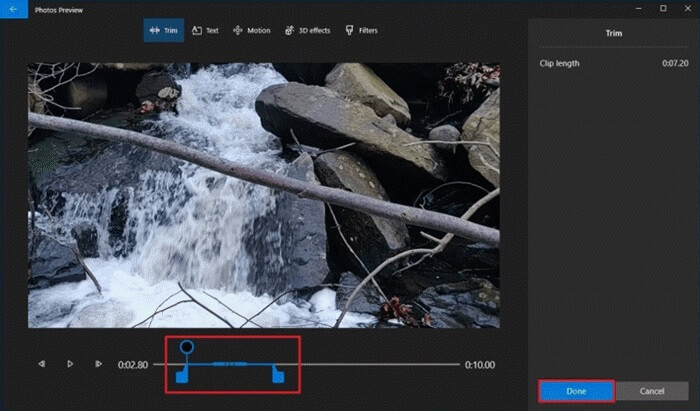
When the video is added to Photos, select the “Trim” tool to open the video editing window. Then, simply adjust the video duration by dragging the sliders on both sides. The green color shows the part you would absolutely keep after processing the trimming.
STEP 3. Save the Trimmed Video
After the trimming completes, simply hit the “Done” icon to submit the trimming, then the change will be applied, and the trimmed video is created successfully.
How to Trim Video in Windows Media Player
If you once use the featured media player provided by Windows 10 to play videos, you must know about Windows Media Player. Actually, Windows Media Player is able to work more than a player, but also a simple video editor, providing some simple video editing tools such as the video trimmer to help users trim videos directly. The following steps will show you how to use the video trimmer provided inside Windows Media Player:
STEP 1. Open Video in Windows Media Player
When you access the video, you desire to trim on Windows 10 desktop, right-click to open it with Windows Media Player.
STEP 2. Edit Video to Trim It
After opening the video, in the lower-right corner, click the Edit icon and select “Trim” from the editing tools. Then the trimming slider will show up. Simply move the white points to set the start and end points to trim the video.
STEP 3. Save the Trimmed Video
When you have submitted to trim the video, hit the “Save a copy” in the upper-right corner to output it. The newly saved video will then be preserved in the same folder of the original video with “_trim” inserted to the video title. You are able to find it easily.
How to Trim Videos on Windows 10 Using VLC
Like Windows Media Player, VLC is widely used as a media player to stream videos and audios of many mainstream formats. Also, this powerful media player also supports the built-in video trimmer to help cut the video in easy clicks. Prepare your installed VLC software and start trimming the video following this brief guide now:
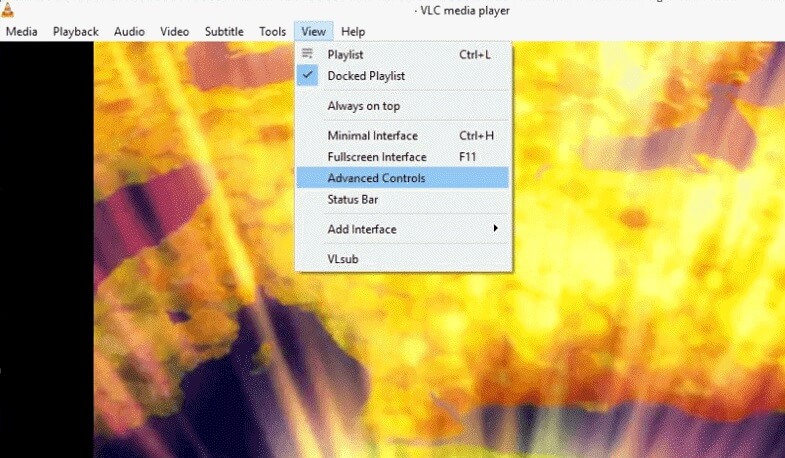
STEP 1. Launch VLC Media Player and go to “Media” > “Open File…” to select the video and import it.
STEP 2. Then, as you open the video you desire to trim in the software, head to “View” > “Advanced Controls” from the top menu bar to awake the editing toolbar below the video playback window.
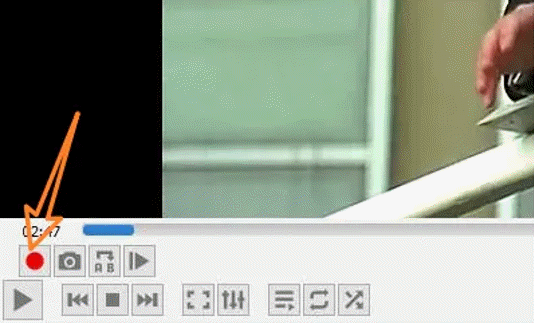
STEP 3. Now, play the video till the point you need to start trimming and hit the “Record” icon. As it plays to the timing when you desire to stop, hit the “Pause” icon again to stop the recording.
STEP 4. The trimmed video is just created as you stop the recording process. Now, simply navigate to the “C:\Users\Username\Video” location and find it on your Windows 10 PC.
How to Trim Videos Using FFmpeg on Windows
The shortcoming of using some programs to trim videos may result in inaccurate video trimming outputs. To accurately trim a video, using FFmpeg is also an ideal pick. Although it may be a bit more complicated to get started, but it is able to trim video at the exact timings as you set. By following the steps here, you are still able to do the video trimming with ease. Try it with the guide now to trim video at specific time:
STEP 1. When you have installed FFmpeg, launch the software and get ready to trim the video.
STEP 2. Before getting started, you need to specify the accurate point you desire to trim the video at first. For example, you need to mark down the timing when you need to start trimming it or end the trimming, like at 120 seconds and 300 seconds respectively.
STEP 3. Now, copy and paste the following command line to FFmpeg, with the starting and ending points entered, and also the file name typed (to let the software find your program and process the trimming on it):
$ ffmpeg -ss 120 -to 300 -i video-file.ext -c copy trimmed_video.ext
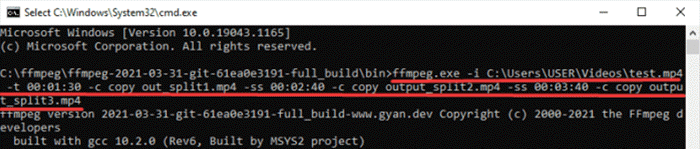
Explaination: “-ss” means the point to start trimming the video, while “-to” refers to stop it at 300s. “-i” follows file name of the video you desire to trim, and “-c” is for setting the output name of the trimmed video.
Bonus Tips: Trim Videos on Different Social Media Platforms
Video trimming is a frequently-use tool to edit videos, especially before uploading to the video streaming sites for sharing online. To bring more convenient services, actually, many social media platforms would embed such functionality to their video uploading process. Here would simply show you the way to trim videos on YouTube and Snapchat.
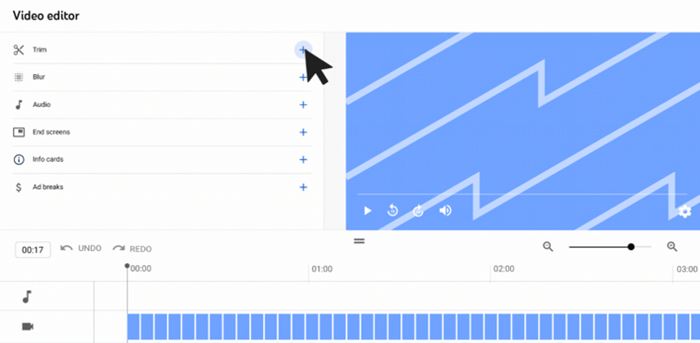
1. Trim YouTube Video
After login your YouTube Studio, click your profile icon and select “Content”. Now from the video list, select the YouTube video and find the “Trim” option in the left “Video Editor”, and you are able to trim the YouTube video directly without using extra software.
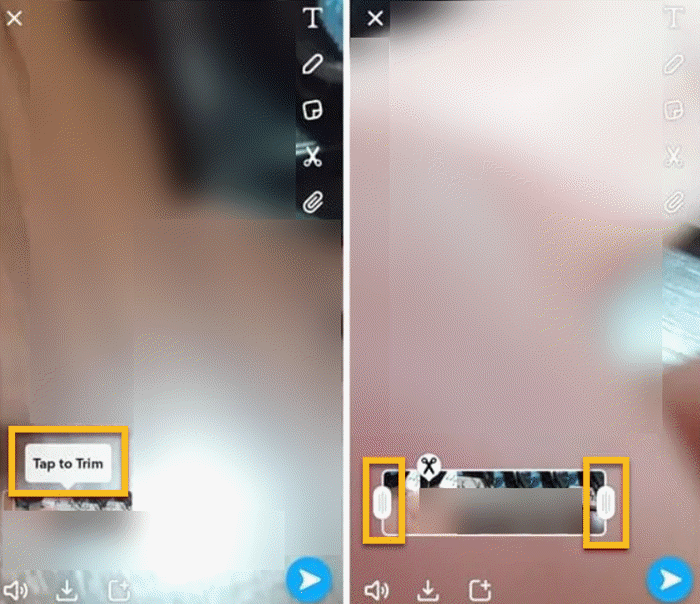
2. Trim Snapchat Video
After launching the Snapchat on your mobile devices, login the account and record a video using the camera. Before sharing it, you are able to trim the video directly by tapping the video clip and drag the sliders to set the start and end points. When completes trimming the video, tap the “Send” icon and the trimmed video is ready to be shared with your friends through chats.
Video trimming is an essential skill to edit videos before sharing or publishing or video platforms. From this blog, you get several easy and quick ways to trim videos without hassle. Simply pick your ideal method to deal with the video trimming when you need!

