How to Add Audio to Video: 10 Effective Way for All Platforms
- Karen Nelson
- April 9, 2022
Download Video Converter Ultimate for Free!
Adding audio over to the video after shooting is quite necessary when the sound quality is underwhelming and rough. Even though you are making a video without any narrations, adding background music to the video can make your shooting more engaging and attractive. What’s more, when you want to re-dub a movie, or when you want to record and add your own voice tutorial for an instructional video clip, you need a useful tool to help you add sound to video.
If you need a way to do so, this article will show you the best 10 ways with detail steps to add audio to video for free. Let’s get started!
How to Add Audio to A Video via the Best Tool VideoSolo
For users who want to add background sound and music to video on Windows and Mac, a versatile video converter is highly recommended – VideoSolo Video Converter Ultimate. This is a professional video converter which can help you put audio over a video and extract audio from video in couple of minutes. It allows you to add audio format in MP3, WAV, FLAC, AIFF, etc. to your MP4, MOV, WMV and other videos.
Not only equips with basic adding audio function, it also allows you to trim the video duration, crop the video area, make video collage, create delicate MV, and more. It also supports to customize the video/audio code, frame rate, bitrate, resolution etc., which is definitely an all-in-one tool.
Now, Let’s follow the guide below to add audio to video step by step.
Step 1. Initiate the VideoSolo Video Converter Ultimate
Download and install the converter on Windows or Mac. Then open the main interface.
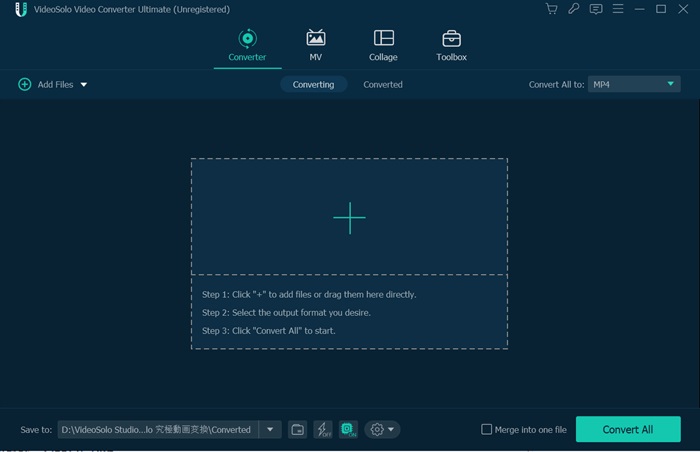
Step 2. Import the video that you want to add audio to
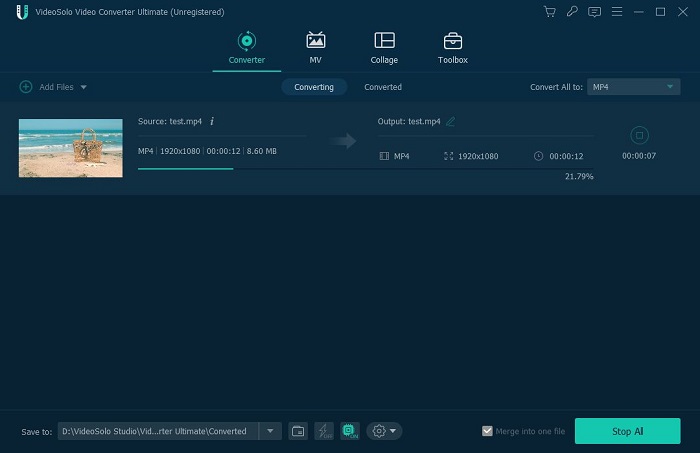
Click the button of “Add Files” to upload the video file. This tool also supports batch conversion at one go.
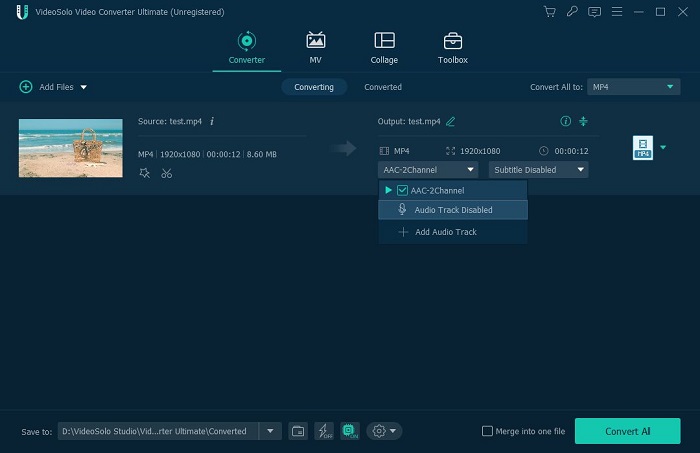
Step 3. Add audio to the video
You can see an Add Audio Track option at the bottom right of the taskbar, from where you can choose an audio track for the video. The added audio file will display on the selected audio track part, and you can click to choose one or multiple audio tracks for your video.
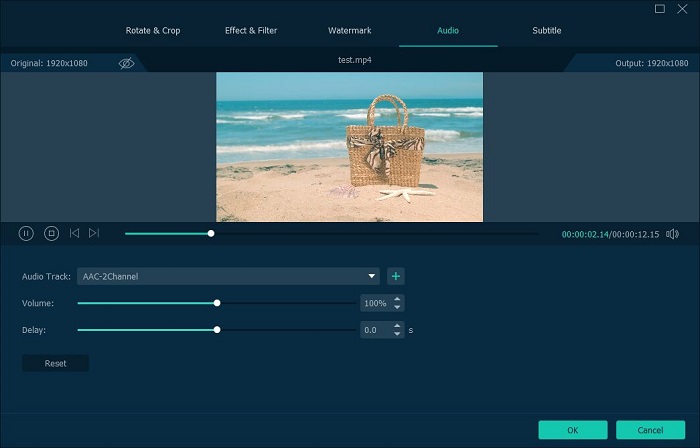
Step 4. Edit video
In the bottom left of the taskbar, press the Edit button to edit your video. Here you can adjust the Volume and Delay of the audio tracks. There are other options to clip and edit video with the built-in tools, such as “Rotate & Crop“, “Effect & Filter“, “Watermark“, and “Subtitle“.
Step 5. Export video with sound track
After making sure all video added, you can choose an output format for the videos in the main interface. Then click the “Convert All” button to start export the video with background music. When the conversion is complete, you can go to the “Converted” tab to view the videos.
Bonus Tip: How to Add Audio to Screen Recording
If you want to record the screen activity on the computer and then add your own voice or background music to make it a complete instructional video, a personalized travel vlog, a memorable video, etc., VideoSolo is undoubtedly your best choice.
First, you can use VideoSolo Screen Recorder to screen record your PC/Mac, which is a powerful screen recording software. In addition to recording your screen activities, it can also record webcam, as well as make real-time annotation during the recording process. It is worth mentioning that its schedule recording function can prevent users from missing the recording time or suddenly need to leave the computer during the recording. In addition, it is also very useful to lock a window for recording, which can prevent other pop-up windows from affecting the recording process. What’s more, when your computer or software is shut down abnormally, just open VideoSolo Screen Recorder again, click “YES” in the pop-up window so that you can restore the recorded content.

After finishing the screen recording, now you can use VideoSolo Video Converter Ultimate to help you add audio to your screen recording. Just follow the step-by-step guide mentioned above, you are able to complete the whole process in 5 easy steps. With this powerful software, you can also fully edit your video to make it your own. For example, using VideoSolo Video Converter Ultimate, you can stabilize your shaky vlogs, add dozens of different filters, add or remove watermarks, add subtitles to your videos, crop or rotate films, and so on.
Other 6 Ways to Add Audio Track to Video Recommended
1. EaseUS Video Editor
EaseUS Video Editor is an all-in-one tool for both beginners and pros. Speaking of inserting music into video clips, this program offers various kinds of built-in background music, such as Relaxing, Brisk, Fashion, and sound effects. What’s more, if you don’t want to apply this provided music, you can import whatever audio files you want to use as a background and then add the sound to the video with one click.
Step 1. Import target video file
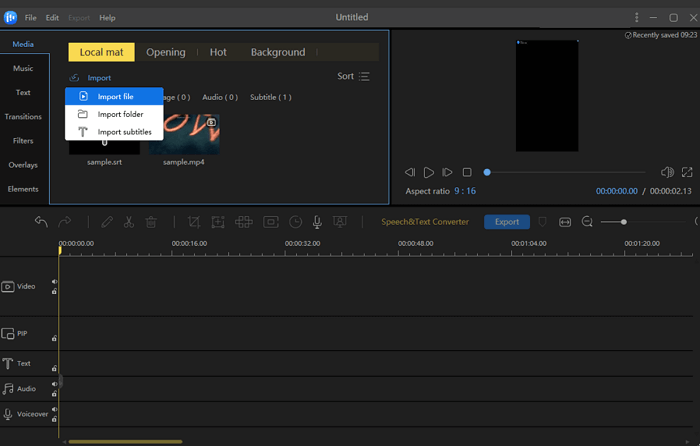
Launch EaseUS Video Editor, then import target file by clicking “Import” or dragging it into EaseUS Video Editor.
Step 2. Add to project
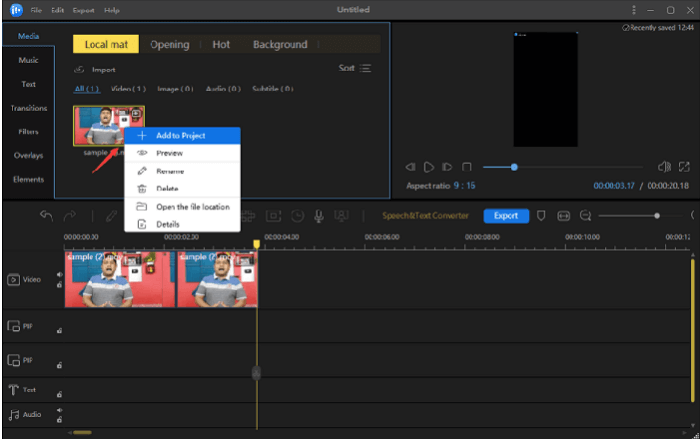
Right-click on the target video or video & audio file you would like to edit, and select “Add to project” to put to the video and audio track. You can click “Music” on the left panel to choose music to add to video.
Step 3. Export video with music
Now you can click “Export” on the toolbar to export the video with background. Under the “Video” tab, choose a file format for the edited video. You can also edit the file name, customize an output folder and settings and then click “Export”.
2. Movai Video Editor Plus
With this easy-to-use music video editing software, you’ll combine audio and video in a couple of minutes! Movavi’s software for Windows and Mac OS allows you to add sound to a video in MP3, WMA, OGG, or FLAC format to your MP4, AVI, or any other format video and save it as a new file.
Step 1. Install Movavi Video Editor Plus
Open the file you’ve downloaded and follow the on-screen instructions to install the app on your PC or Mac.
Step 2. Add media files to the program
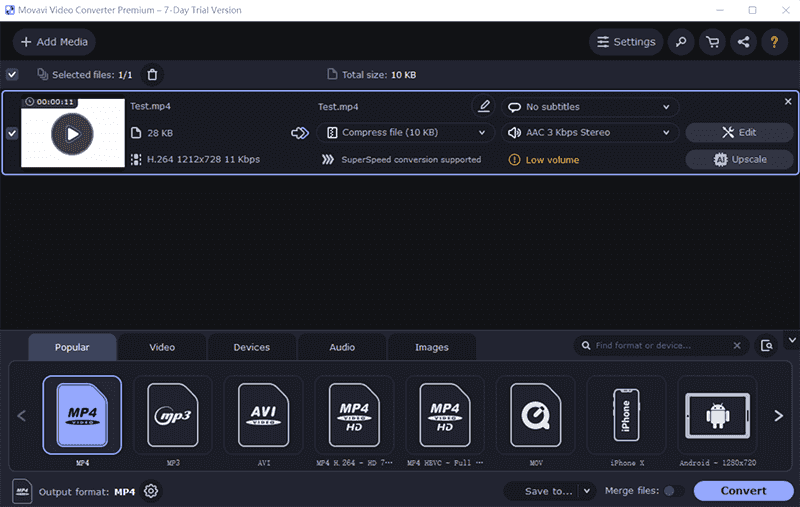
Launch the music video editor. To add audio to the video, click Add Files and upload the video and audio files you want to merge. All the files will be added on the Timeline board below: the video files will be placed on the Video Track and the audio files on the Audio Track marked with the musical note icon.
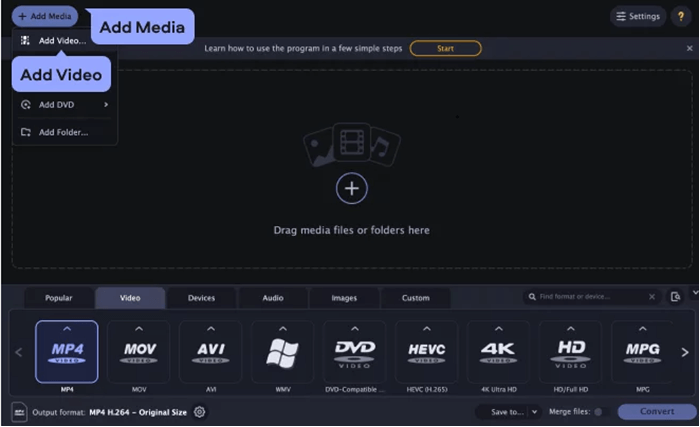
Step 3. Adjust the audio file
If the video and the soundtrack lengths do not match, you can edit the audio in your video in numerous ways. If the video is longer than the music track, you can double the audio and place the copied files side by side on the same track.
Step 4. Save the video clip with audio
Click Export and choose how you would like to save your video from the tabs in the left part of the pop-up window, choose the destination folder in the Save to field and click Start.
3. Wondershare Filmora
With Wondershare Filmora, you can easily add audio to video, record the voiceover directly and add it to video, or replace the original audio track (stream) with a new audio file. The software comes with dozens of unique features. For instance, its different and diverse features like AI Portrait, Chroma Key Background, Split Screen, and much more.

Step 1. Add audio and video files to the program
After downloading and installing Wondershare Filmora, you can drag and drop audio and video files to the project media library.
Step 2. Add a new audio file to the video
Drag the audio and video files from the media library or Audio Library and place them on the respective tracks of the timeline, namely, place the audio file to the Audio Track. This way, the audio file(s) will be merged into the video.
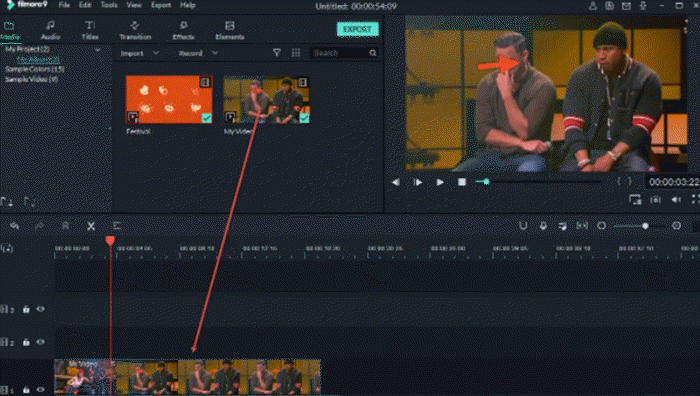
Step 3. Adjust the audio file and be creative
Various audio editing tools are available: set volume, speed up, slow down, change pitch and add fade in/out effect. Double-click the audio file on the timeline to change the settings and drag the slide bar.
Step 4. Export video with new audio track
Click “Create” and select “Format” when all is ready. From the list, choose any format you want as the output format. Finally, click the “Create” button to export a new video file.
4. Adobe Premiere Pro
Adobe Premiere Pro is also a professional tool to help you add audio track to video within a few clicks. With the right features in Adobe Premiere Pro, you can take advantage of presets within the audio editor designed for common types of audios and videos. Premiere Pro is able to support a wide variety of video and audio files, including MP3 audio, WAV, WMA, and AVI.
Step 1. Open Adobe and import video file
You can add your video clip to Adobe by Dragging the file from Media Browser into the Project panel, or click Select Video File > Import from Media Browser.
Step 2. Add audio to video
Tag tracks using the presets in the Essential Sound panel drop-down menu. All tracks tagged as background music will behave in certain preset ways. Dialogue and voice-over will generally be slightly louder and more audible than background music or effects. You can always tweak the settings for tracks in the Essential Sound panel.
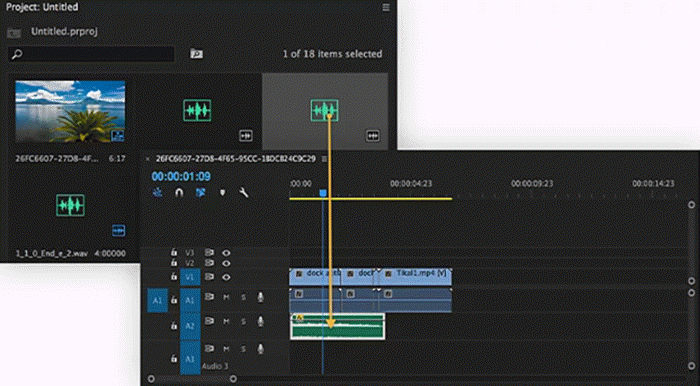
Step 3. Enable the Auto Ducking feature
While presets are designed with industry-standard quality in mind, you can also alter them as you see fit for a particular project. Whatever adjustments you make, don’t trust your ears when it comes to the final output volume of your video. Keep an eye on the audio meters. The final mix should peak between -12 and -6dB on average.
5. VLC
VLC Media Player is an effective player that not only plays audio and video but enables you to add audio to video, remove the background noise from video, resize video, cut video, and convert video. It is compatible with all mainstream platforms like Windows, Mac, and Linux. It is open-source tool and available for free with all incredible features.

Step 1. Add video file to VLC Media Player
Open VLC media player, click on “Media” in the top menu and choose Open File to select the video file that you want to add audio track to.
Step 2. Import audio file
You need to click the Browse button to import the video, then select Sync other media. click the Select button to import the audio file for editing. By clicking Audio Effect, you can apply different audio effect to the video.
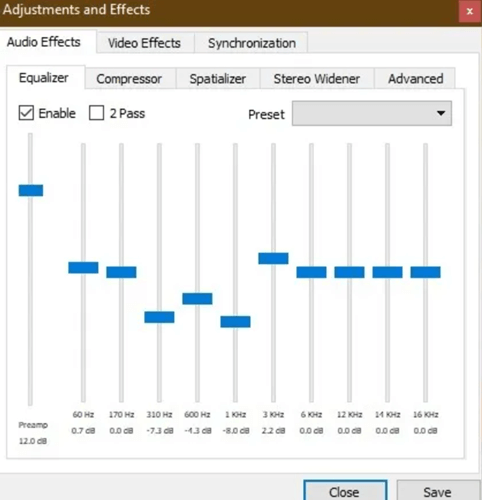
Step 3. Export your video
Finally, you can click Save to export you video files. you can also choose a preset that automatically configure all the settings for you.
6. iMovie
iMovie is a default app installed on Mac and iOS devices. iMovie offers the ability to add background music and sound effects that play simultaneously with the sounds contained in the video. Apart from that, it is also a helper to make clean background noise from your video, and you can get a video with high-quality sound. You can also cut or trim videos.
Step 1. Import video files
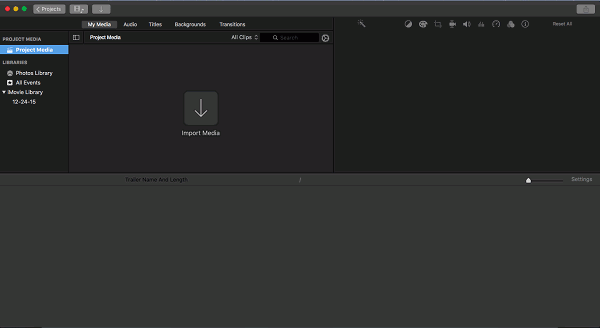
Import a video file by click File > Import Media into the project and drag it onto the timeline.
Step 2. Add audio sound to video
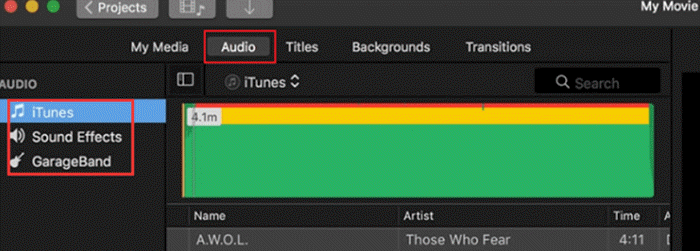
Click “Audio” and import the audio clip from iTunes, Sound Effects, and GarageBand. Once you’ve selected the audio you want to add to the video, drag it to the background music well below the timeline.
Step 3. Adjust audio files
Select the audio and stretch the vertical line at the head or tail to adjust the duration of the background music. If you want the video to have music throughout, adjust the duration of the background music to match the duration of the video. After the audio is selected, a horizontal line will be displayed in the middle of the audio, and the volume of the audio can be adjusted by it.
Step 4. Export your video with soundtrack
When all the details are well adjusted, you can export your video with the background music.
How to Add Audio to a Video with Online Tool
1. Clipchamp
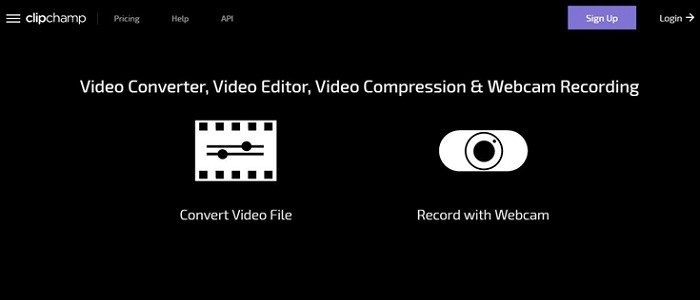
Clipchamp is a simple but powerful free online video editor that makes it easy to pair great audio with your video content. Being a browser app, it doesn’t require you to go through the complex process of downloading any software at all. You simply have to open Clipchamp in your browser and start with your process. This also works with images and photos where you can add sound separately to create a video slideshow with background music.
Step 1. Creating your video
Once you’ve signed up, click on ‘Create a Video’.
Step 2. Add video and audio files to the project
In the new project, use the ‘Add Media’ button to add video and audio files to your project.
Step 3. Add audio to your video
Once you’ve selected your audio and video files, head back to your project and you’ll see them appear in your library, now you just need to drag both files down into your timeline.
Step 4. Trim or cut audio to fit
After you add an audio track this way you may need to trim it to fit the length of your video. Instead of trimming, you can also cut the audio by dragging the white needle to the point where you’d like to have the audio stop and hitting the Scissors icon labeled “Split”.
Step 5. Export your video with audio
Once you’re happy with all your audio levels, it’s time to export the video and enjoy the results.
2. Clideo
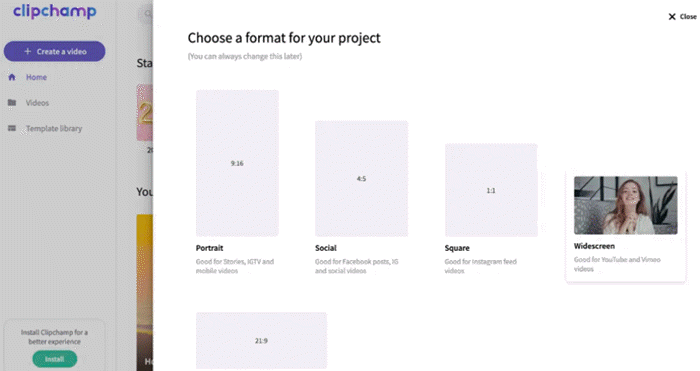
Clideo is another powerful online tool to add audio track to video, it is compatible with any device, meaning you can easily add audio in video without re-encoding on your Mac, Windows (7, 8, and 10), Android, or iPhone. It is divided into many small widgets for you to merge, compress, resize, cut, crop, rotate, loop videos, add subtitles, or to make stop motion and slideshows, etc.

Step 1. Upload a video to Clideo
Add your video by clicking on the “Choose file” button. You can choose it from your PC, Mac or mobile device’s onboard storage or from cloud platforms Google Drive or Dropbox.
Step 2. Add your chosen music track
Next up, choose which audio you’d like to add to your video. This file can be a song, a recording, a sound of any kind. If it’s longer, you can always trim it by clicking on the scissor’s sign. In the opened menu, move the markers to the necessary beginning and ending of the track.
Step 3. Download the edited video
After a few minutes (depending on the size of your video file) your clip completed with audio will be available. Simply click the “Download” button to save it to your device.
How to Add Background Sound on Android and iPhone
If you need to add audio track to your phone for quick editing, then Inshot is a convenient and powerful editing app for you. There are free vlog music and sound effects for you to choose, you can also add your own music as you like. Not only can Inshot add audio to video, but also it can trim video, remove the middle part, split video, merge clips, and adjust speed.
Step 1. Download InShot Video Editor and open it. Tap “Video” to import the video that you want to add music to.
Step 2. Tap on the “Music” > “Tracks” button successively, and you will see several choices to add music under three sections – Featured, My Music, and Effects. You can choose anyone based on your needs.
Step 3. Once done, you can press on the checkmark on the right side and tap on the “Save” button at the top right corner.

Overview of Core Features of the 10 Ways to Add Audio to Video
| Product | Clear Interface | Quality | Remove & Add Watermark | Editing Tool | Support OS |
| VideoSolo | √ | Lossless | √ | √ | Win/Mac |
| EaseUS | √ | High | √ | √ | Win/Mac |
| Movavi | √ | High | × | √ | Win/Mac |
| Wondershare | √ | High | × | √ | Win/Mac |
| Adobe | × | High | × | √ | Win/Mac |
| iMovie | √ | High | × | × | Mac |
| Clipchamp | √ | Middle | × | √ | Win/Mac |
| Clideo | √ | Middle | × | √ | Win/Mac |
| Inshot | √ | Middle | × | √ | Android/iPhone |
No matter what platform you are using, in this article, you can find the best solution to get to know how to add audio to your video. If you still can’t decide which to choose, here we highly recommend VideoSolo Video Converter Ultimate. It not only enables you to add music, text, subtitle to the video, but allows you to trim, clip, and change the video speed and convert them to 1000+ formats as you want.

