


Recording computer audio is essential for creating tutorials, podcasts, gaming streams, or preserving online content. If you’re struggling with how to record audio from a computer, you've come to the right place. This post brings you the five best ways to record computer audio on Windows, on Mac, and online. Moreover, in-depth reviews and tutorials are also included. Now, pick a preferred way to record audio from your computer.
Ultimate Solution to Record Audio from Computer [Best]
VideoSolo Screen Recorder is an all-in-one recorder that caters to all your recording needs, let alone record computer audio from a microphone or system sound. The recordings can be saved into popular formats like MP3, M4A, WMA, AAC, WAV, and FLAC of up to lossless quality.
Better yet, you can apply noise cancellation and voice enhancement if you want to record a microphone. When done recording, you are able to trim, compress, and convert the audio file if needed.
More Sparkling Features to Explore
- 20+ Recording Modes Supported – Audio Recorder, Video Recorder, Game Recorder, Webcam Recorder, Phone Recorder, and many other modes for any scenario.
- Lossless Video and Audio Quality – The recordings can be exported with lossless quality at up to 60fps.
- Music Recorder for All Platforms – VideoSolo Screen Recorder enables you to record online HD music from Spotify, YouTube Music, SoundCloud, etc.
- Real-Time Annotation – When recording a video, you can add text, lines, arrows, callouts, images, and highlights to make a pro tutorial video.
- Recording Without Interruption – You can set a fixed window to start recording and avoid any unexpected disturbance during recording.
- Advanced Post-Processing Tools – Utilize editing tools to cut, crop, compress, or convert the recording with ease.
VideoSolo Screen Recorder is easy to use and compatible with both Windows and macOS systems. Let's learn how to record audio from a computer in a few steps.
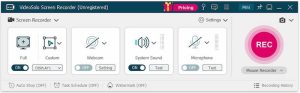
Step 1. Click "Audio Recorder" on the Main Interface
Launch VideoSolo Screen Recorder after the installation. To record computer system audio, click “Audio Recorder” on the main interface when the program is launched.
It's noted that you need to install an audio driver when recording audio if you're using a Mac.
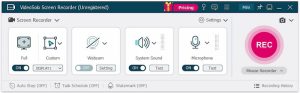
Step 2. Set Proper Recording Volume
Before recording, you can adjust the appropriate system sound and perform a sound test to get ready.
- If you just want to record sound from computer, you'd better turn off the microphone to avoid unnecessary noises.
- If you want to record microphone sound from a computer, it's recommended to enable noise cancellation and microphone enhancement to ensure better and clearer audio quality.
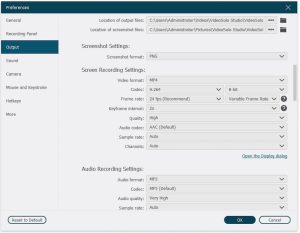
Step 3. Modify Output Settings (Optional)
In the output tab, “MP3” & “High” are selected by default and you can easily modify them to WMA, M4A, AAC, and lossless in Windows.
In the Mac version, the output formats are MP3, M4A, WMA, CAF, FLAC, OGG, and OPUS.
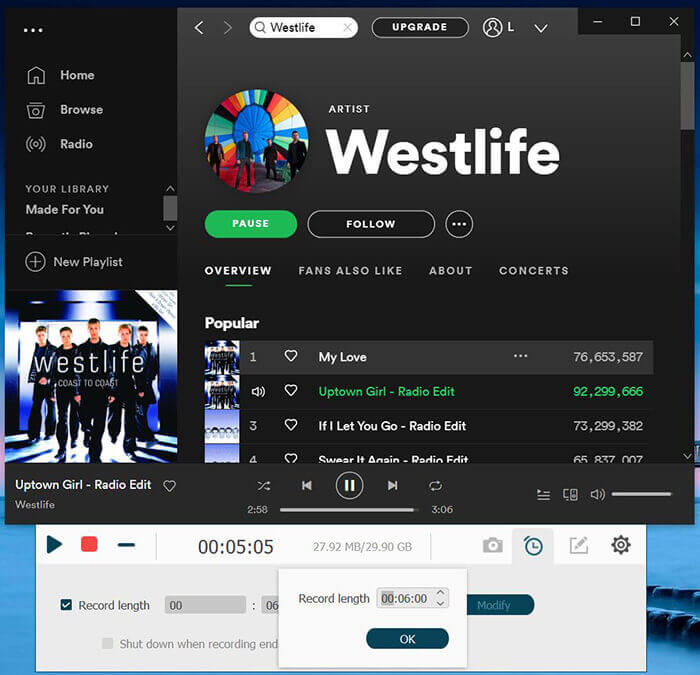
Step 4. Click "REC" to Start a Recording
To avoid missing a few seconds at the beginning of the audio, you'd better start the recording first by clicking the “REC” button and then turning on the audio playing on your computer.
Use the "Trim" feature to remove the unwanted part from the recorded audio track. Click the "Pause", "Stop", "Set record length", and "Option" buttons to control audio recording.
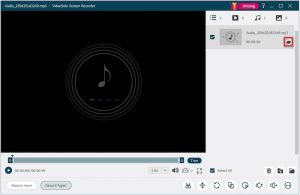
Step 5. Preview and Clip Computer Audio Recording
Once you stop recording, you enter a preview window. Click the Open Folder button, and you'll find the recorded audio file saved automatically on your computer.
| Pros |
|
| Cons |
|
How to Record Computer Audio with Microsoft Voice Recorder
Note: Microsoft Voice Recorder, the internal audio recorder for PCs, is the easiest way for Windows users to record computer microphone. All you need to do is to check your computer microphone accessibility and capture your voice.
This tool only works for microphone recording, and it doesn't capture any internal audio playing on your computer. Also, the default audio format is encoded in M4A with the inability to choose another preferred audio format.
Step 1. Check your Microphone
Before recording your audio, make sure that your microphone is turned on. Open System Settings and go to the Input tab. Choose your microphone from the drop-down menu and set the volume.
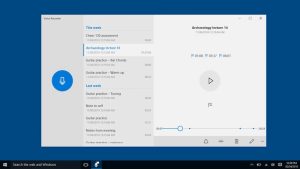
Step 2. Open Windows Voice Recorder
Click the Start menu and search for Windows Voice Recorder in the search bar. Then open the app.
Step 3. Start Audio Recording
The recording icon is in the middle center. Hit it and start recording. When you finish your recording, the file will be automatically saved in the Sound Recordings folder.
| Pros |
|
| Cons |
|
How to Record Computer Audio with QuickTime Player on Mac
Developed by Apple, QuickTime Player is not only a popular and free official Mac media player for any downloaded video or image, but also a powerful recorder. It can record your screen, record a movie with an inbuilt camera, or record computer audio with your internal or external microphone. Also, you can crop the audio file when done recording.
Note: The output format is set to M4A only, so you cannot export the audio to other formats, and the audio quality will be encoded at lossy 44.1 kHz AAC audio. Moreover, QuickTime Player cannot record sound from computer when you're playing a song or trying to record audio from a browser.
Step 1. Open QuickTime Player
QuickTime is a built-in software on your Mac device. You can search for it in your search bar and open it.
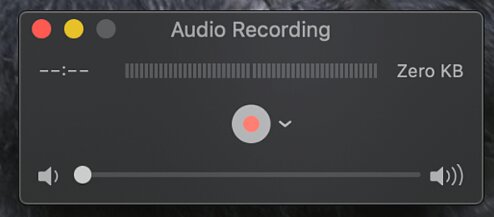
Step 2. Select “New Audio Recording”
Once you open the QuickTime Player, choose the “New Audio Recording” in the File list of the top-bar menu.
Step 3. Set Your Recording Volume
You can adjust the slider beneath your recording button to change the recording volume. QuickTime also allows you to adjust the recording quality by clicking the Drop Arrow next to the recording button.
Step 4. Click the Record Button and Begin Recording
After all the settings are done, you can click the red dot and begin the record. Once you're done, click the “Stop” icon. The file will be saved as an M4A file on your device.
| Pros |
|
| Cons |
|
Record Computer Audio Without Any Software [Online]
Except for an internal audio recorder for PC, Online Voice Recorder can also let you record computer audio online with no need to download any software. This online tool is available online and accessible with any browser on any device. Only by clicking on the button in the middle will it start recording the sound of your microphone and export the recording to an MP3 file.
Moreover, the site offers many audio tools to make it easy for you to trim audio, change volume, change speed, change pitch, reverse audio, merge audio, and equalize the audio. Though the Online Voice Recorder claims that it'll never upload your recording to its servers, you may still risk leaking privacy to record computer audio online.
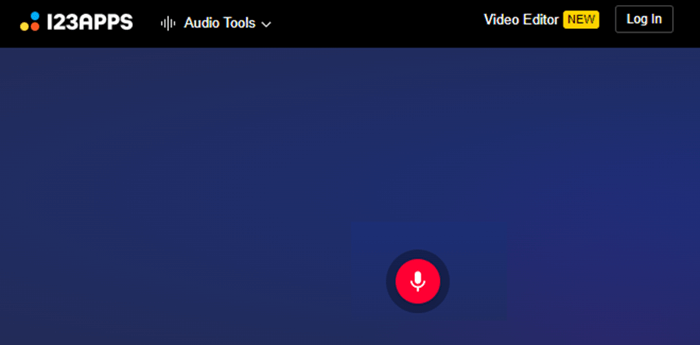
Step 1. Open Online Voice Recorder
Search online voice recorder in your browser and open it.
Step 2. Microphone Settings
You can adjust your microphone settings by clicking the rightmost setting icon.
Step 3. Start Recording
After selecting the right microphone, you can begin your recording by hitting the red dot button. You can stop recording by hitting the Pause button. After you're recording done, hit the Red Square and finish recording.
Step 4. Trim and Save Your File
After recording, you can preview and trim your audio. The file will be directly saved to your device as an MP3 file.
| Pros |
|
| Cons |
|
How to Record Audio from Computer via Audacity
Audacity is one of the best open-source and completely free audio recording software for computers. It enables you to record live audio through a microphone or sound from other media to WAV, AIFF, MP3, AU, FLAC, and Ogg Vorbis audio formats with high-quality resampling and dithering. You can also record multiple channels at the same time.
After that, you can cut, copy, paste, and delete multiple soundtracks if necessary. Better yet, you can add extra plug-ins and effects to adjust and preview your audio recording in real time.
Step 1. Download and open Audacity
Navigate to the Audacity website to download and install the software.
Step 2. Setting the input and output devices to record the audio.
You need to set the correct input and output device before your recording. Go to the "File" and then choose "Preferences" to do your settings. For Mac devices, you just click "Preferences" in the Audacity interface.
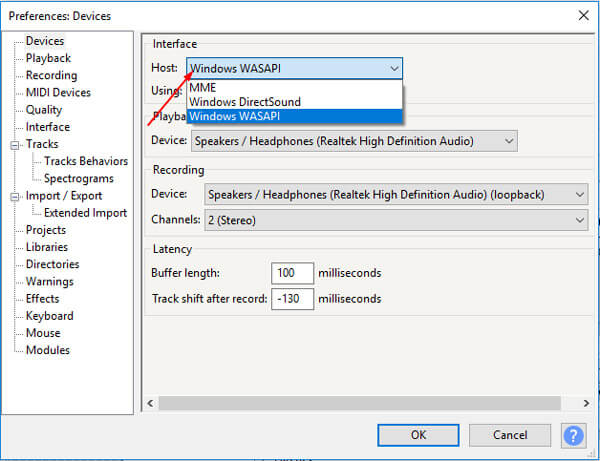
Note: If you're using Windows devices to record sounds, you need to select the "Windows WASAPI" option as the audio host.
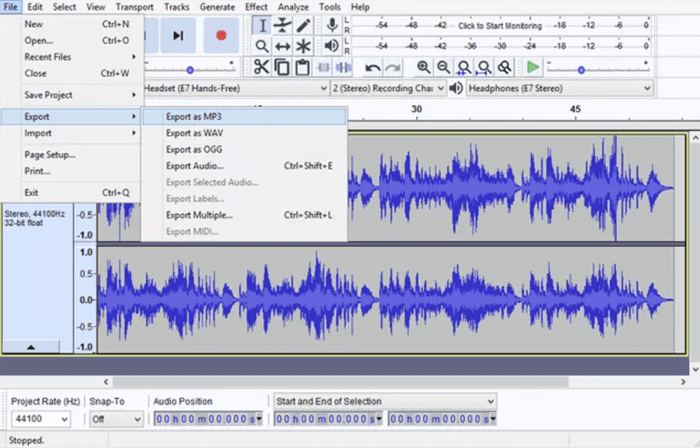
Step 3. Start recording and save your audio file.
Click the "Record" button to start recording after all the settings, and hit "Stop" to finish. Once you finish, Open the File tab and find the "Save Project", click to save your files. If you don't want to do extra editing for your audio, just click "Export" in the "File" menu to export your files.
With Audacity, you can further fine-tune the performance of your audio. However, all these bells and whistles make it challenging to get down to Audacity and record computer audio with it for new starters. In this respect, VideoSolo Screen Recorder does better with a clear and easy-to-go interface and additional screen and web recording features.
| Pros |
|
| Cons |
|
Comparison Table: Choose the Best Way to Record Computer Audio
Here comes a comprehensive comparison of these 5 ways to record computer audio. Now, let's walk through the table before making a choice.
| VideoSolo Screen Recorder | Microsoft Voice Recorder | QuickTime Player | Audacity | Online Voice Recorder | |
|---|---|---|---|---|---|
| Audio Format | MP3, M4A, WMA, AAC, WAV, and FLAC | M4A | M4A | WAV, AIFF, MP3, AU, FLAC, and Ogg | MP3 |
| Audio Quality | Lossless Quality | Lossy | Lossy | High Quality | Lossy |
| Record Microphone | √ | √ | √ | √ | √ |
| Record Media Audio | √ | × | × | √ | × |
| Record Screen | √ | × | √ | × | × |
| Record Webcam | √ | × | √ | × | × |
| Real-time Annotation | √ | × | × | × | × |
| Editing Feature | √ | × | × | √ | × |
| Cut Video | √ | √ | √ | √ | √ |
| Easy to use | √ | √ | √ | × | √ |
Bonus: How to Record Computer Audio in High Quality
1.Environment Optimization:
Select a quiet, acoustically controlled space. Disable devices like fans, printers, or notifications to eliminate unexpected disruptions.
2. Hardware Setup:
Prioritize external mics for studio-grade results. Built-in laptop microphones are prone to distortion and ambient noise.
3. Software & Settings
Choose professional software. Use tools like Audacity, Adobe Audition, or VideoSolo Screen Recorder to capture audio.
4. Recording Best Practices
Record a 30-second sample to check clarity and adjust settings before the main session. When recording, use closed-back headphones to catch any sound issues in real time.
5. Post-Production Enhancements:
After recording, trim pauses and normalizes volume to boost mid-range frequencies for clearer vocals.
Conclusion
If you wonder how to record audio on PC without microphone, you can choose either Audacity or VideoSolo Screen Recorder. However, if you want a one-stop recorder for any recording needs, VideoSolo Screen Recorder stands out with 20+ recording modes and the ability to record lossless audio and video on your computer. Give it a shot and you'll need no more recorder.