



 Download Screen Recorder For FREE!
Key Takeaways: The ability to record your screen can be achieved with both tools included with Windows (Xbox Game Bar, Snipping Tool) or third-party professional screen capture programs. We compare their features, describe how to use each of them, and offer you some useful tips for a successful screen capture with the right screen capture software.
Why use desktop recording software? The simple answer is to make a tutorial, report a tech bug, or record an online presentation. But when you search for screen capture recording in Windows. Windows' native tools may not give you the precision you need when selecting screen areas, recording sound, or adding annotations. Professional desktop recording tools can save you time and enable greater flexibility. The challenge here is to identify when Windows' methods will do the job and when you should reach for a more capable tool.
Quick Comparison: Windows Screen Recording Methods
Recording your screen in Windows can be done in various ways, but each method gives you a different level of control over what part of the screen you want to capture, whether audio is recorded, and so on. Here's a brief comparison of built-in tools versus a pro solution.
| Feature | Xbox Game Bar | Snipping Tool (Windows 10 and 11) | VideoSolo Screen Recorder |
|---|---|---|---|
| Recording Area | Primarily a single app or game window | Select a specific rectangular area | Flexible capture options, depending on recording mode |
| Audio Capture | System audio and microphone options | Depends on Windows version and available settings | System sound and microphone controls |
| Built-in Editor | No full video editor | Basic recording workflow; no full editor | Editing and annotation options depend on version |
| Other Features | Quick recording shortcuts and performance overlay | Convenient region selection | Additional recording modes and configurable settings |
| Best For | Quick app or game recordings | Short recordings of a selected screen area | Tutorials, presentations, and recordings needing more control |
Which should you choose?
You can record Xbox Game Bar windows quickly, but if you want to snag part of the screen, Snipping Tool might be more your speed. VideoSolo Screen Recorder is a good choice if you need a more robust feature set when you have a longer recording to work with. Confirm features and version number.
Method 1: Native Windows Built-in Recording Options
1. Xbox Game Bar (Windows 10 and 11)
Windows comes with a free tool called Xbox Game Bar that allows you to capture application windows, with no additional Windows screen recorder needed. This is a handy tool to use when you want to record a short tutorial, gameplay session, or app activity without having to install a third-party screen recording program for Windows.
How to use Xbox Game Bar
Step 1. Open the app or window you wish to record. Press Win + G to bring up the Xbox Game Bar overlay.
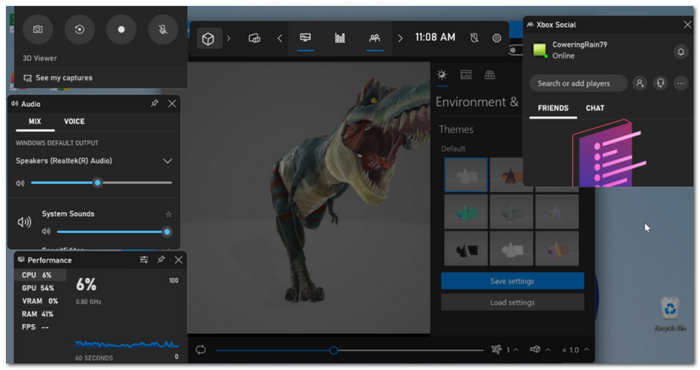
Step 2. In the Capture widget, click the Record button, or press Win + Alt + R to start the recording.
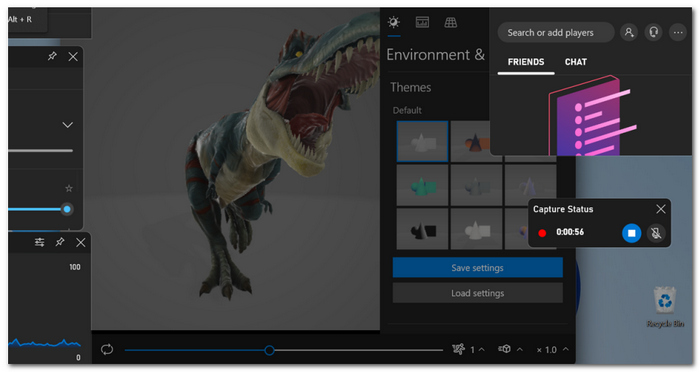
Step 3. When you're done, use that same shortcut to stop recording. Go to your File Explorer and navigate to Videos > Captures, or simply click See my captures to locate the recording you created, saved as an MP4 file.
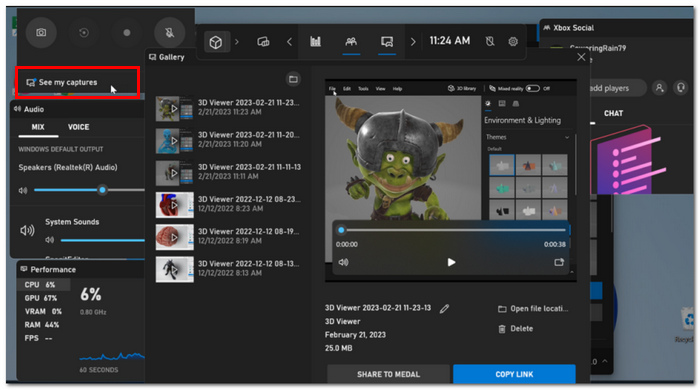
Note: When capturing, Xbox Game Bar captures only the app window, not the desktop or File Explorer. You might need to use a different way to record certain areas outside of an app window. If your main goal is to capture gameplay, explore these PC gameplay recorders and compare their supported recording modes.
2. Windows Snipping Tool (Windows 11)
Windows 11 Snipping Tool also supports screen recording. It allows you to record a portion of the screen rather than the entire app window. If you want to record on your Windows PC and don't want to install any additional third-party apps, this screen recording feature is useful for recording quick and easy tutorials, screen demos, or guiding someone through a task.
How to use Snipping Tool
Step 1. Launch Snipping Tool via the Start menu. Select Record instead of Snip.
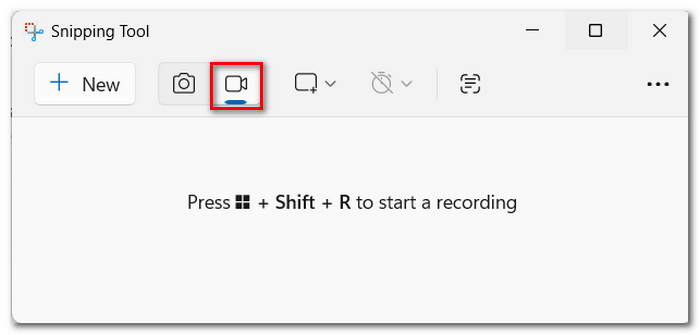
Step 2. Hit New, then click and drag to highlight the area of the screen you want to capture.
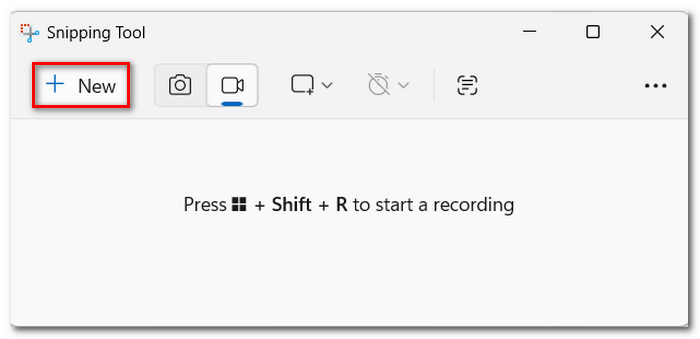
Step 3. Click Start and then wait for the countdown to complete. Click Stop and then review the recording and save.
On supported Windows 11 versions, pressing Win + Shift + S opens the tool directly, though this usually launches the shortcut for taking a screenshot. To record a video, open the app and switch to Record.
Limitations of Snipping Tool
While Snipping Tool is great for short recordings, it might not be adequate for lengthy tutorials or professional demos.
- • Restrictions on capture area: You'll only be able to choose a rectangular area to record within, and not the more advanced capture controls that you may find in most recorders.
- • No real-time markings or mouse highlighting: It lacks built-in tools that let you emphasize your cursor movement, draw on your desktop during recording, or indicate actions.
- • Audio restrictions: Microphone and system audio will work on newer versions, but controls may differ, and some restrictions on microphone recordings may apply based on the background noise. You should always test your audio before recording.
- • Limited editing: You are able to store and view the videos, but more sophisticated editing, effects, and transitions are only possible with another app.
- • File size and performance: Recordings may be large and use up a lot of space on the drive, and require a lot of processor and system resources to use if you have the required PC and you are using advanced settings.
Snipping Tool alone might suffice if you want just a quick screen recording. For longer screencasts or tutorials, and if you want more control over audio, the mouse cursor, and editing, a screen recording program might be more appropriate.
Method 2: Ultimate Screen Capture with VideoSolo Screen Recorder
What Is VideoSolo Screen Recorder?
VideoSolo Screen Recorder is a desktop recording program that can help you record your PC screen on a Windows PC. Advanced recording programs, also known as dedicated recording software, usually give you more control over the recording area, audio recording, and recording modes compared to standard built-in options.
For screen capture recording on Windows, if you need something more powerful than the built-in Windows solutions, VideoSolo is a good choice.
Why Choose VideoSolo Screen Recorder?
If you want to record not only a screen clip, then a competent screen recorder will be needed. You may be able to use VideoSolo in its installed version, based on the features it supports:
- • Select what to record: Choose an area of the screen or some other supported target to record.
- • Record audio: Set system sound and microphone input if available. This can be useful for guided tutorials.
- • Capture various actions: Record the software demo or webcam presentation using any of the recording modes.
- • Tweak the recording options: Set up your video and audio preferences based on the requirements of your project.
- • Keep it simple: Use one app with multiple recording tools instead of opening a new one each time.
Before you record, review the features and settings in your editing software, as there may be variations in available features based on the version you have.
How to Record Your Screen with VideoSolo Screen Recorder
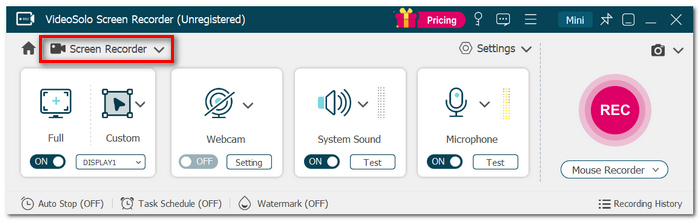
Step 1. Get VideoSolo Screen Recorder from its official website. Open it and choose Screen Recorder mode.
Step 2. You can select full screen, a window, or a custom region based on what you see.
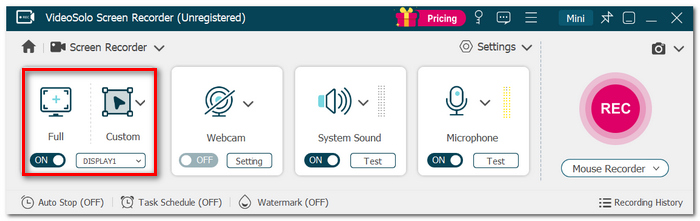
Step 3. Turn on system sound, use microphone input, or record webcam.
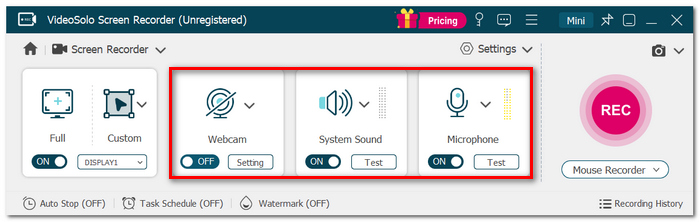
Step 4. Just click the REC button to start your recording of the screen. When you're done recording, stop and review the video either through the preview or edit functions on your device.
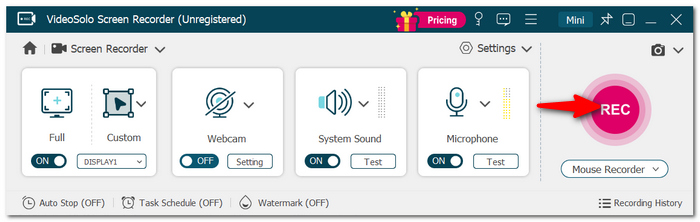
Step 5. Select the output formats you like and then save the recording to your PC.
For dependable screen capture recording in Windows, make sure to test your audio configuration before recording. Doing a quick test can help you identify if system audio isn't being recorded or if you have mic issues before generating the entire video.
User Review: Is VideoSolo Screen Recorder Worth Trying?
VideoSolo Screen Recorder is a practical option for users who need more flexibility when recording tutorials, presentations, or software demonstrations. It brings several recording functions into one application, although available features may vary by version.
Verdict: It is suitable for more advanced recording needs, whereas Windows' built-in tools may suffice for quick and simple captures.
Pro Tips: High-Quality Windows Screen Capture
Your recording should be easy to view, with legible text, silky-smooth movement, and high-quality sound. Here's how to improve your results with any recording program.
- • Select the appropriate resolution: Show off tutorials and presentations in 1080p.
- • Review audio: Make sure to check your microphone and system sound quality before recording.
- • Exit unused apps: Decrease lag by removing demand from your system.
- • Get your desktop ready: Shut down all private documents and hide unneeded notifications.
- • Choose the accurate frame rate: When supported, 30 FPS is recommended for most tutorials or 60 FPS for high motion.
- • Maintain Control: Be steady with the mouse, using the select and highlight tools to keep your cursor displayed.
- • Check your storage: Ensure you have sufficient space to save all your recordings.
- • Test before you start recording: Record a short test clip to verify video and audio quality as well as capture settings.
Follow these easy steps for smooth, clear, and professional-looking screen recordings using Windows.
FAQs on Screen Capture Recording on Windows
How can I prevent screen recordings from capturing confidential information?
Keep private files safe, turn notifications off, and clear your screen. If you need to capture content related to your job, try to ensure confidential information is not on your desktop screen or use a different browser profile or test account. Blur or crop out any sensitive information.
Why is my screen recording out of sync with the audio?
Audio/video can get out of sync due to CPU overload, recording software problems, inconsistent frame rates, or editing and conversion errors. To fix this, close out other programs, make sure you're running the current version of the recording software, then open up the exported file in a different media player. If the issues happen after editing, check the project frame rate. Choosing suitable recording software and checking its settings before capture can help you avoid some common recording problems. Compare the best screen recording software options to find one that fits your needs.
My screen recording has black frames and flickering. What do I do?
Graphics drivers and recording software should be updated. Try to observe whether you are facing this issue with a specific app or display setup. This can be caused by hardware acceleration, graphics, capture limitations, and incompatible recording configurations.
Conclusion
Which is the best screen recording program for Windows users? As for a Windows Screen Recording Program, built-in screen recorders are best for quick recordings, while VideoSolo Screen Recorder is good for people who require more recording freedom.
More Readings
Capture screen activities, audio, webcam, gameplay, and mobile screens on Windows and Mac with high quality.

