


In the process of using an intelligent computer, there are times when it is necessary to record a video. Video recording has been a very common function that helps record films and television materials, and develop video tutorials such as make-up guidance or travel strategies.
Excellent software often saves a lot of time and makes work easier. This post recommends the four best free desktop recorders for Mac that will do a favor for your video capture.
Part 1. Features that Can Help You Choose the Best Screen Recorder for Mac
How do you define a fine screen recorder or an excellent one? It can be measured in the following two aspects.
Elementary Features
Clear Interface: A clear interface that allows you to master how to record your screen at the first sight is important.
Selectable Area: Selection of a full screen, a small area of the screen region, or even a recording area with custom resolution values is the most basic feature of a screen recorder.
Selectable Audio: When you record the computer screen, the audio is also needed on most occasions, whether the system sound or the microphone sound.
High Quality: If the recorded video is of low quality and even too blurry to recognize the contents, you won't feel like using that recorder again.
Highlight Features
No Watermark: Some screen recording tools record your Mac screen with ugly watermarks to market their software product. But a user-friendly screen recorder needs to avoid this.
Long Recording Length: You may miss this point when choosing a screen recorder, but it's essential to use a screen recorder that allows you to record a long video over 2 hours if you need to record a meeting or a live stream.
Editing Tool: The most common situation where you need this feature is cutting out the extra beginning or ending part of the screen recording.
No Lag: When you record a long video, some screen recorders tend to lag, which may even lead to the audio not being in sync with the image. An excellent one should be able to record your screen without lags.
Part 2. Overview of 10 Best Screen Recorder for Mac (Table Comparison)
With their own features, these 10 screen recorders for Mac each stand out in different situations. Before getting to know them fully, let's have a quick overview of the details about their features and performance of them.
| Product | Clear Interface | Area Selection | Audio Selection | Quality | Editing Tool | No Lag | Overall Score |
|---|---|---|---|---|---|---|---|
| VideoSolo | √ | √ | √ | Lossless | √ | √(up to 60fps) | 4.9 |
| Monosnap | √ | √ | √ | High | × | √ | 4.7 |
| OBS | × | √ | √ | High | √ | × | 4.5 |
| Camtasia | √ | × | √ | High | √ | × | 4.5 |
| Quicktime Player | √ | × | √ | High | × | √ | 4.5 |
| Icecream | √ | √ | √ | High | × | √ | 4.6 |
| Screencast-O-Matic | × | √ | √ | High | √ | × | 4.6 |
| Screencastify | √ | √ | √ | Middle | √ | × | 4.6 |
| Apowersoft | √ | √ | √ | Middle | √ | × | 4.4 |
Part 3. List of 10 Best Screen Recorder for Mac Free
After viewing the table, you may have known some features about the 10 best screen recorders. Now let's learn more details of them one by one.
We have to admit that not all screen recorders here are totally free, but they all have a free trial version for you to try. Then, to pay for it or not is your own choice.
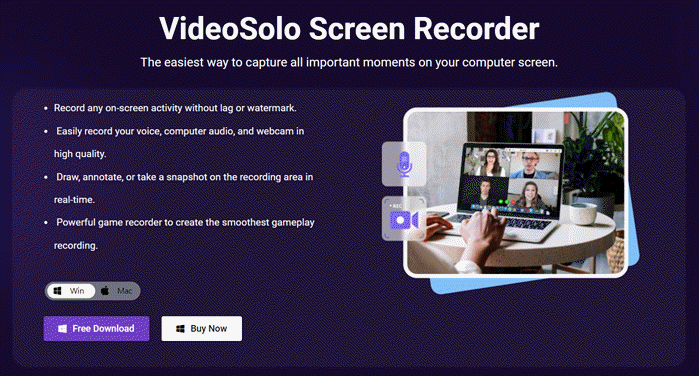
1.VideoSolo Screen Recorder
Best for:All users who need to record screen
| Pros | Cons |
|---|---|
|
|
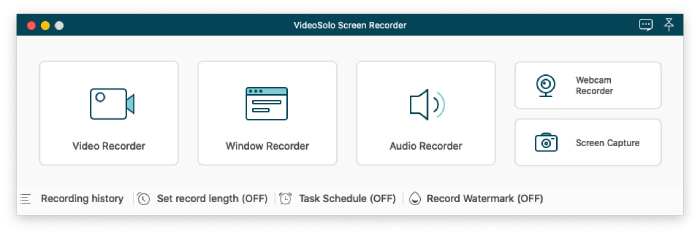
The first recording software for Mac computers that we highly recommend is VideoSolo Screen Recorder.Not only can you take advantage of this versatile screen recording tool to capture screen activity but also you can choose to record from your webcam or external microphone. These integrated features make it especially ideal for creating tutorial videos or demonstration videos.
During capturing video from your Mac, the software program provides options to add shapes or arrows for annotations. The resultant recordings can be exported as popular formats such as MP4, MOV, or GIF. One particular feature is that the recording tool will automatically save a backup during the process and therefore you will have an option to restore the recording even if you accidentally exit the program.
How to Use VideoSolo
Now let's see how to record Mac screen with audio in a few clicks.
STEP 1. Download and install VideoSolo Screen Recorder to your Mac, then launch the software
STEP 2. Choose the Full or Custom setting to decide the recording area. Also, set up the system sound and microphone volume according to your need.
STEP 3. Click the red REC button to begin capturing the screen. Don't forget, you can add other elements like drawings or annotations to the video!
STEP 4. Stop recording and preview the video before you save it.
STEP 5. You can trim the recording before saving. Finally, directly click on Save and the video will be kept locally.
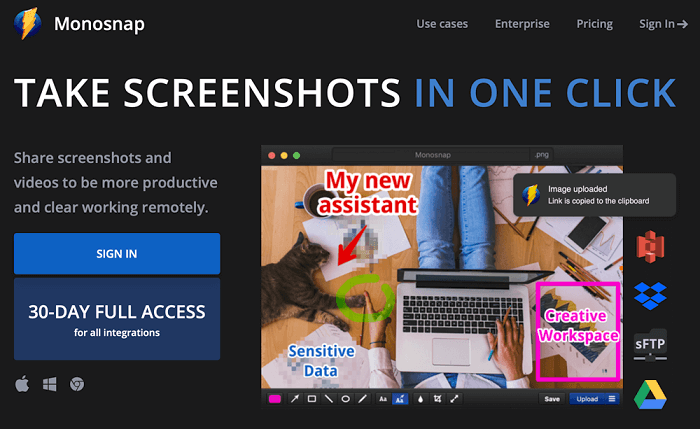
2. Monosnap
Best for:Designers, IT team, education, and customer support team, etc.
| Pros | Cons |
|---|---|
|
|
Monosnap is a lightweight and free Mac recording software that has an easy-to-comprehend interface for all users. Same as VideoSolo screen recorder, Monosnap gives you the options to record webcam, microphone, and system sound at the same time. When you've done recording, you can easily upload the video or audio to popular social media and create a shareable link with your friends so that they can conveniently stream the video.
Besides, you will find a useful built-in image editing tool to enhance the screenshot you take with Monosnap. Basically, it is a comprehensive screen recorder integrated with different useful recording features.
 How to Use Monosnap
STEP 1. Please download Monosnap from the official website to the desktop and activate it. Once you have enabled it, you can read through the app guide to understand Monosnap.
STEP 2. Click on its icon on the menu bar of your Mac.
STEP 3. Select Capture Area and define an area to capture.
STEP 4. After the screenshot is finished, you can use the feature bar to adjust and revamp the screenshot.
STEP 5. Please save the screenshot to your Mac after your modification.
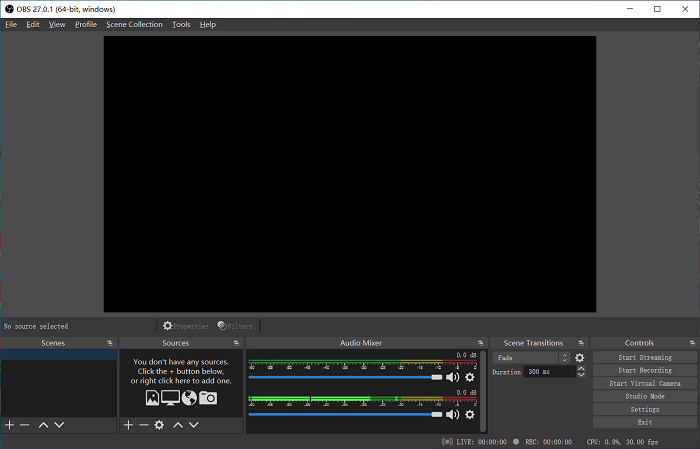
3.OBS Studio
Best for:Live Streamers
| Pros | Cons |
|---|---|
|
|
Perhaps you are looking for a screen recorder that is perfect for gameplay recording and OBS Studio should be your optimal choice. It is a professional and free gaming recording software app for Mac users. Packed with tools such as mixer and editing options, OBS enables video creators to tweak settings that they want and make creative productions.
But for users that are not tech-savvy, OBS will require a steep learning curve. And its Modular UI may even make newbies confused. But just like two sides of a coin, techies can find it convenient to work with multiple sources on OBS. With the right add-ons or plugins available, OBS will definitely make the gameplay recording task more efficient.
 How to Use OBS
STEP 1. Please navigate to the official website and install OBS Studio to your Mac device. After the download is accomplished, please load the OBS Studio.
STEP 2. At the first time of using it, OBS Studio will show you the auto-configuration wizard where it will test your system and settings.
STEP 3. Check if the audio setting is working by entering into the Audio Mixer section beside the Sources box.
STEP 4. Choose a source video for editing. Click on the “+” button at the bottom of the window. Subsequently, you can add different filters and output the videos to the format that you prefer.
You May Need: 8 Best OBS Alternatives for Mac/Windows (2026 Updated)
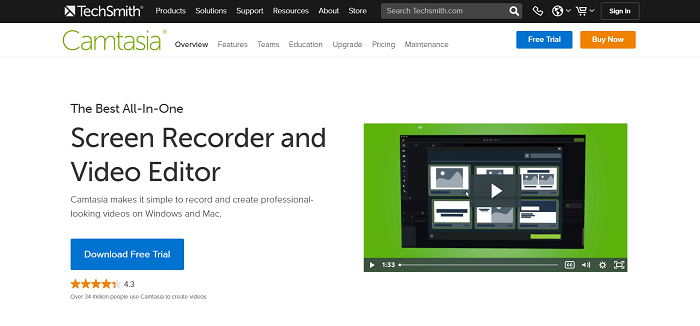
4.Camtasia
Best for:Video creators (especially for starters)
| Pros | Cons |
|---|---|
|
|
Camtasia should be no stranger for Mac users. It is an excellent choice for users with demands for video recording and video editing. As you first launch Camtasia, it will notify you to create a project. And after recording raw footage such as your screen activities or webcam videos, Camtasia's professional interface will make it effortless to build a video workflow. You can easily make adjustments to your recording videos such as adding a custom watermark or adding filters. But one small drawback that I can think of is its limited output format options.
How to Use Camtasia
STEP 1. Please click the hyperlink above and install Camtasia to your Mac device.
STEP 2. Please select any installation extras. For example, you can set the PowerPoint Add-in. If you don't need it, just skip it. Next, please wait for the Camtasia installation completed and run it.
STEP 3. Choose Record the Screen in the window.
STEP 4. Determine the recording area.
STEP 5. Set other options like whether to open webcam or audio.
STEP 6. Open the page that you would like to record and start recording by tapping the red button.
STEP 7. After you think you finish capturing, click on Stop. Then, you can use various tools or effects to decorate your videos.
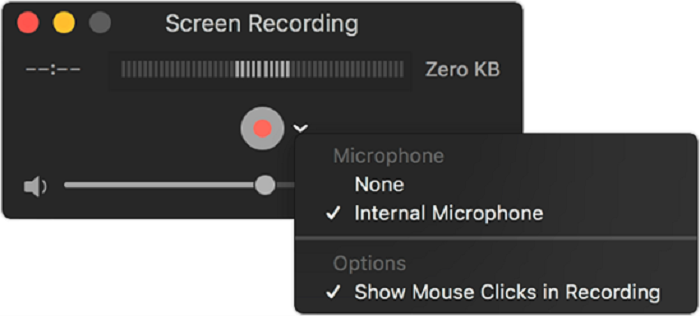
5.QuickTime Player
Best for:Mac users who opt for built-in tools
| Pros | Cons |
|---|---|
|
|
Compared with other Mac screen recorders mentioned above, QuickTime Player outperforms for its stability. It is a reliable default app on Mac for video playback as well as screen capture. Also, you don't have to pay a penny but to record your screen with no time limit.
Using QuickTime won't take you long to learn and grasp. Directly go to “File” > “New Screen Recording”, and then the program will pop up a menu for video capture. Select the dropdown icon next to the record button so as to choose a microphone as the input source.
Essentially, QuickTime Player comes with all basic tools such as rotation, trimming, and splitting to improve your resultant video when the recording session is over.
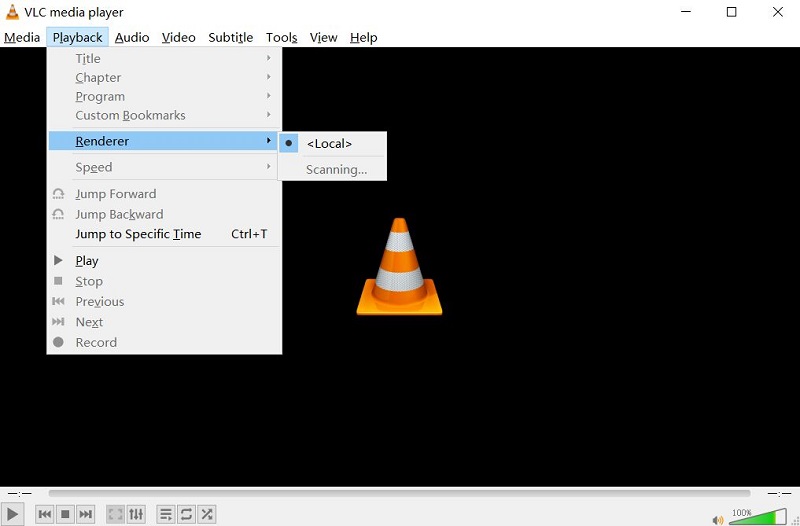
6.VLC Media Player
Best for:those who record the entire screen but not audio
| Pros | Cons |
|---|---|
|
|
Who doesn't know VLC? It's one of the simplest media players around. It plays the most sight and sound documents and even DVDs, Audio CDs, VCDs, and different streaming protocols, and it works not only as a video and audio player, but also as a converter and screen recorder. As a open-source cross-stage interactive media player, it's absolutely free to use!
But the program has some disadvantages in the area of screen recording. The first is that it provides a poor audio recording. You cannot use the microphone to record your voice. Secondly, there is neither screenshotting function nor customization of the capture area size. Finally, if you want a high-resolution video, you'll have to free up a lot of space on your hard disk because the file is going to be pretty huge. Though it's not the most powerful recording tool, it's still a choice to use while considering the convenient playing extensions on Mac.
How to Use VLC Media Player
STEP 1. Download and open VLC, then click on Media > Open Capture Device [CTRL + C].
STEP 2. For Capture Mode, choose “Desktop”. Also chose a desired frame rate.
STEP 3. In the bottom, press the small down facing arrow and choose “Stream”. After opening a stream output wizard, hit “Next”.
STEP 4. In “New destination” make sure “File” is selected and then click on Add. Browse the location to save your recording file and give in a full filename, and then hit “Next”.
STEP 5. Under profile choose the video format and container. Hit “Next”. Click on “Stream” and the recording will begin immediately.
7.Icecream Screen Recorder
Best for:Recording computer games
| Pros | Cons |
|---|---|
|
|
Icecream Screen Recorder has an easy-to-use interface with only a few buttons, so you won't get confused by obscure settings. It has all the features you need for simple screen recording. A neat feature that lets you quickly select the same recording area that you used last time makes Icecream Screen Recorder differs from others. Secondly, you can add your branded logo to the output. Thirdly, it is ideal for recording gameplays. You are even able to take screenshots during your recording.
However, Icecream Screen Recorder has small range of video editing tools and there are too many limitations in the free version. If you use the trial version, you can only capture 5 minutes of footage, and there are many other restrictions, too. In addition, it should be noted that some chargeable features don't work on Mac. The price of the advanced version is a little higher than average.
How to Use Icecream Screen Recorder
STEP 1. Download and install the application.
STEP 2. Click the “Settings” button in the bottom right corner of the main window of the software and tweak the configurations in such tabs as System, Save to, Video, Audio and Hotkeys.
STEP 3. Click the “Capture video” button in the middle of the program's main windows to start selecting the recording area. Click other buttons to set everything as you need.
STEP 4. Once it's all set, click the “Rec” icon to start capturing.
More Detailed Information: Icecream Screen Recorder Review [2026 Updated]
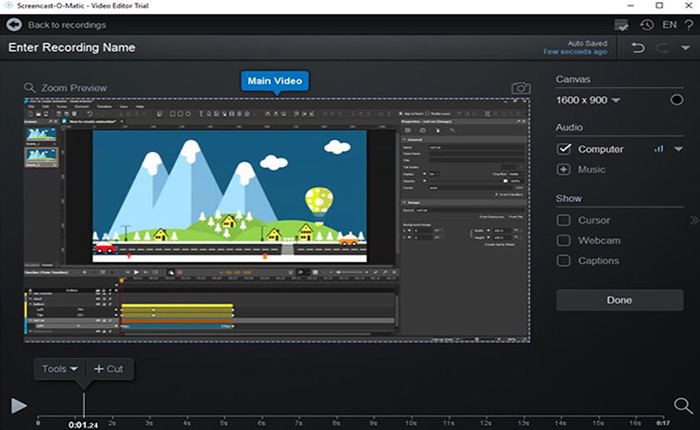
8.Screencast-O-Matic
Best for:Business use
| Pros | Cons |
|---|---|
|
|
Screencast-O-Matic is one of the best-known programs, with millions of users all over the world. It's a screen recorder and video editor in one. The best aspect is that the company offers cloud hosting, so you can get unlimited ad-free uploads and collaboration tools. Plus, there's a secure recording files backup to online storage. Screencast-o-Matic is definitely appropriate for both personal and business use.
But Screencast-o-Matic has limited functionality in the free trial version and the majority of functions are fee-based. Of course, you can take screenshots and edit images to add arrows, text, highlights and more with Screencast-o-Matic, but no other advanced video editing tools. If you want to enjoy more features of the software, you need to at least pay a monthly subscription to use the fully featured program.
How to Use Screencast-O-Matic
STEP 1. Click on the Launch Free Recorder option.
STEP 2. Edit the settings for recording method, size, and narration.
STEP 3. Select “Preferences” to set hotkeys for various commands.
STEP 4. Click the record button to start recording your screen.
9.Screencastify (Browser Extension)
Best for:Users need to draw on videos
| Pros | Cons |
|---|---|
|
|
Screencastify is an extension that works like a powerful video and audio recorder. No registration for storing or downloading videos is needed. You can feel free to record screens, including your browser and desktop. It's possible to add voice commentary with a microphone and include your webcam image in the recording. Also, it includes drawing and editing tools that you can use in real time, which may be useful if you want to highlight a particular web page element or just have some fun. The recorded videos can be published on YouTube or automatically saved to Google Drive. The files can also be exported in MP4, animated GIF, or MP3 formats.
However, Screencastify will scan your browser data, which is not so safety for the users' information. And you can not customize the area size of your screen capture.
How to Use Screencastify
STEP 1. Install Screencastify, pin the extension to your browser and connect your account with Google Drive.
STEP 2. Click the Screencastify arrow icon next to the puzzle piece.
STEP 3. Choose what you want to record: your Browser Tab, entire Desktop, or Webcam Only.
STEP 4. Turn on the toggle next to “Microphone” or the one next to “Embed Webcam” as you need.
STEP 5. Click the blue “Record” button. You'll see and hear a countdown if you have one enabled, and then your recording will begin.
10.Apowersoft Free Online Screen Recorder
Best for:Single use or Users who do not want to download software
| Pros | Cons |
|---|---|
|
|
Apowersoft records all types of screen activities – streaming videos, self-demonstrations, online calls, and more. This web grabber has wide choice of output formats that even desktop programs do not always have. One nice thing is that you can edit your recordings in real time. After you're done with recording, you can upload your video to Vimeo, YouTube, Dropbox, or Google Drive. Considering all these options, we'd say it's one of the best online solutions you could find.
You may ask what's the catch. Although Apowersoft Free Online Screen Recorder works online, you still have to install a specific launcher to use the app. Moreover, it's not that suitable for game recording, because as an online tool, it is vulnerable to network stability.
How to Use Apowersoft Online Screen Recorder
STEP 1. Click “Start Recording” to activate this online recorder.
STEP 2. Customize the recording mode and region, then start recording.
STEP 3. Save the video to local disk or upload it to RecCloud, YouTube, etc.
Extended Reading: Apowersoft Screen Recorder Review 2026
Conclusion
As there is more and more information online, people are continually seeking ways to record others' activities and materials for use in learning and working. Therefore, this post recommends the 10 best screen recording software for Mac.
If you are looking for these software programs, take one and they are sure to be professional! Besides, don't miss VideoSolo Screen Recorder, which really stands out with its powerful functions.

